eWebinar's embeddable widgets are designed to let you create your own registration pages or help you promote your webinars in an effective, attention-grabbing manner, without having to write your own code.
We strongly recommend not embedding your widget in an <iframe>, if you can avoid it. Here is why.
There are three main types of widgets:
- Widgets for webinar landing pages
- Widgets for registration thank you pages
- Widgets for webpages (like your homepage) and blogs
You may access our widgets from the eWebinar home page by clicking the Widgets button on any published webinar, since widgets are webinar-specific.

When you click Widgets, a dialog will open where you can choose and configure one of the widgets and then easily copy its code to paste into a third-party page builder.
Once you have chosen the widget you wish to use, you will need to:
- Configure the widget
- Install the widget
- Customize the widget (CSS)
- Updating the widget (after installation)
For instructions for using widgets on specific platforms, refer to these articles:
- VIDEO - How do I use eWebinar widgets on my Hubspot landing page? (1m 19s)
- How do I use eWebinar widgets in my WordPress pages?
- How do I use eWebinar widgets on my SquareSpace site?
3 TYPES OF WIDGETS TO CHOOSE FROM
1. Widgets for landing pages
There are four types of widgets you can use when building your own webinar landing page: Embedded player, Embedded form, Fixed bar widget, or Button widget.
Two big benefits of using our registration widgets are:
- reCaptcha makes sure bots don’t register using your forms which could lead to tens of thousands of bogus registrants within the span of an hour.
- We verify that emails are valid during the registration process, which means the emails you get are much higher quality than you would on standard forms with a much higher deliverability rate.
Embedded player widget
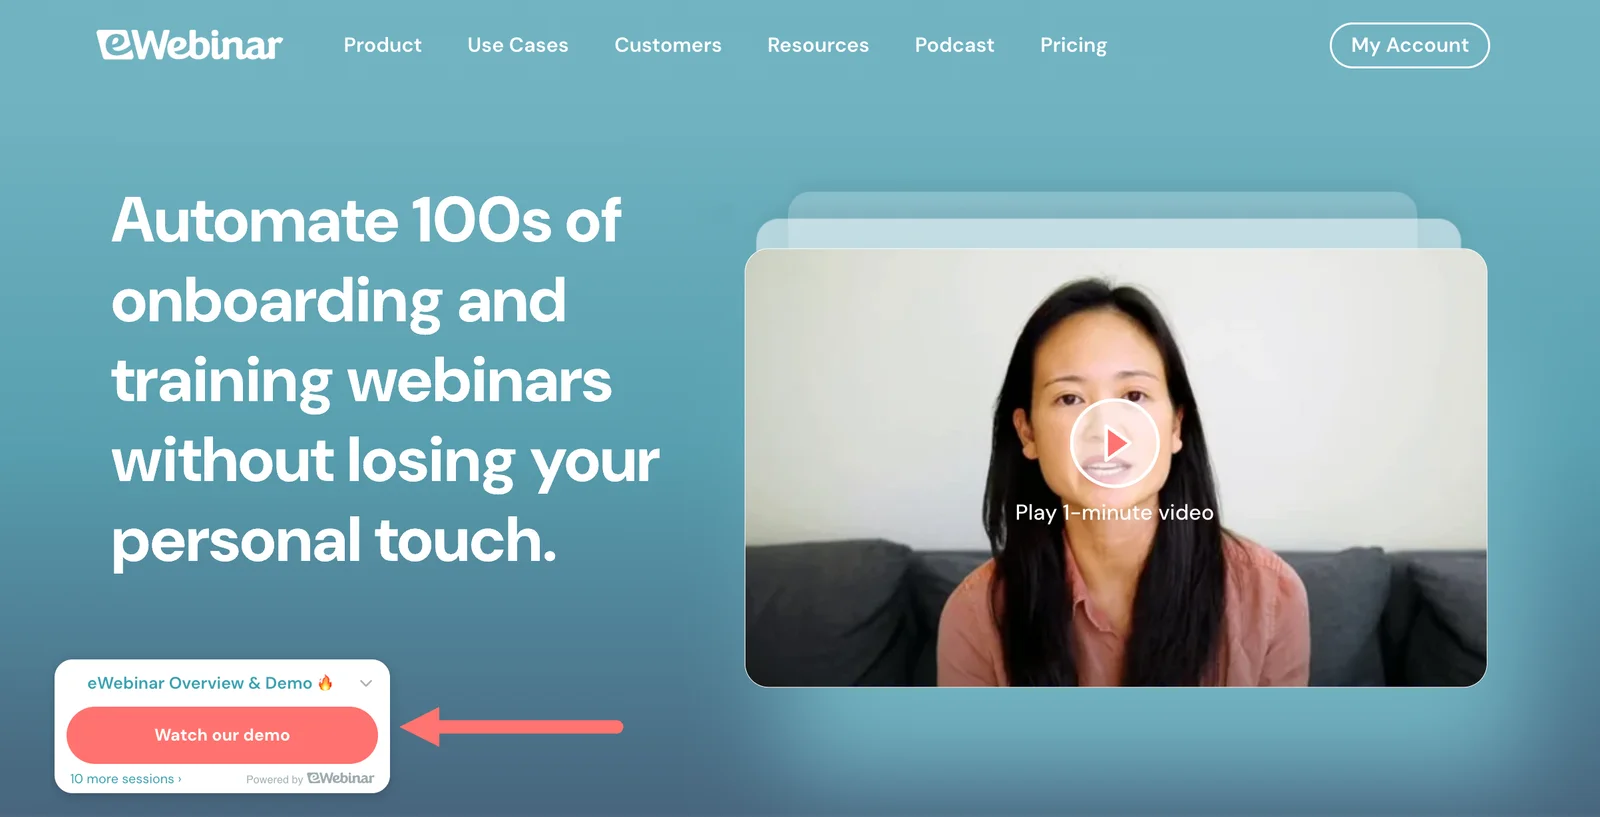
The Embedded player widget lets you embed the eWebinar video player into any webpage or landing page.
Traditionally, people go to a landing page, register for your webinar, and then are taken somewhere else to watch it. With our embedded player, people can click to watch an on-demand session or replay of your webinar right from your landing page.
The embedded player is currently in BETA. When the BETA period ends, the embedded player widget will become a part of the Custom domain subscription add-on and you will only be able to add the embedded player to your own domain and subdomains.
Below is an embedded player of eWebinar's on-demand demo. Click the play button below to see how the full eWebinar experience expands to fill the page.
NOTE: The image that appears in the embedded player is your social sharing image, which you can change under Sharing on the Settings tab when editing your webinar.
With the embedded player, you can choose to:
- Allow people to join your webinar anonymously (including an ungated on-demand webinar or an ungated replay)
- Surface a registration form before they start watching
- Surface a registration form at any point later in the video *
In-Video Registration
To surface a registration form at the beginning of or during your webinar in the embedded player, add the In-video registration interaction to your video.
When you do, you can choose to make registration:
- Required: People are unable to watch or continue watching your webinar until they sign up for it
- Optional: People can skip registration and watch or continue watching your webinar anonymously
To learn more about adding registration to the embedded player, check out this article on the topic:
How do I surface a registration form in ungated sessions including in the embedded player widget?
Embedded form widget
The Embedded form widget is a registration form that you can embed on any webpage or landing page. When you configure the form, you can choose to keep it very simple (as shown below) and show only a name and email field, so that when a visitor registers for your webinar, they are immediately taken to an on-demand session or replay. The simplicity of this version of the form was designed to reduce friction for registrants to make the signup process as seamless as possible.
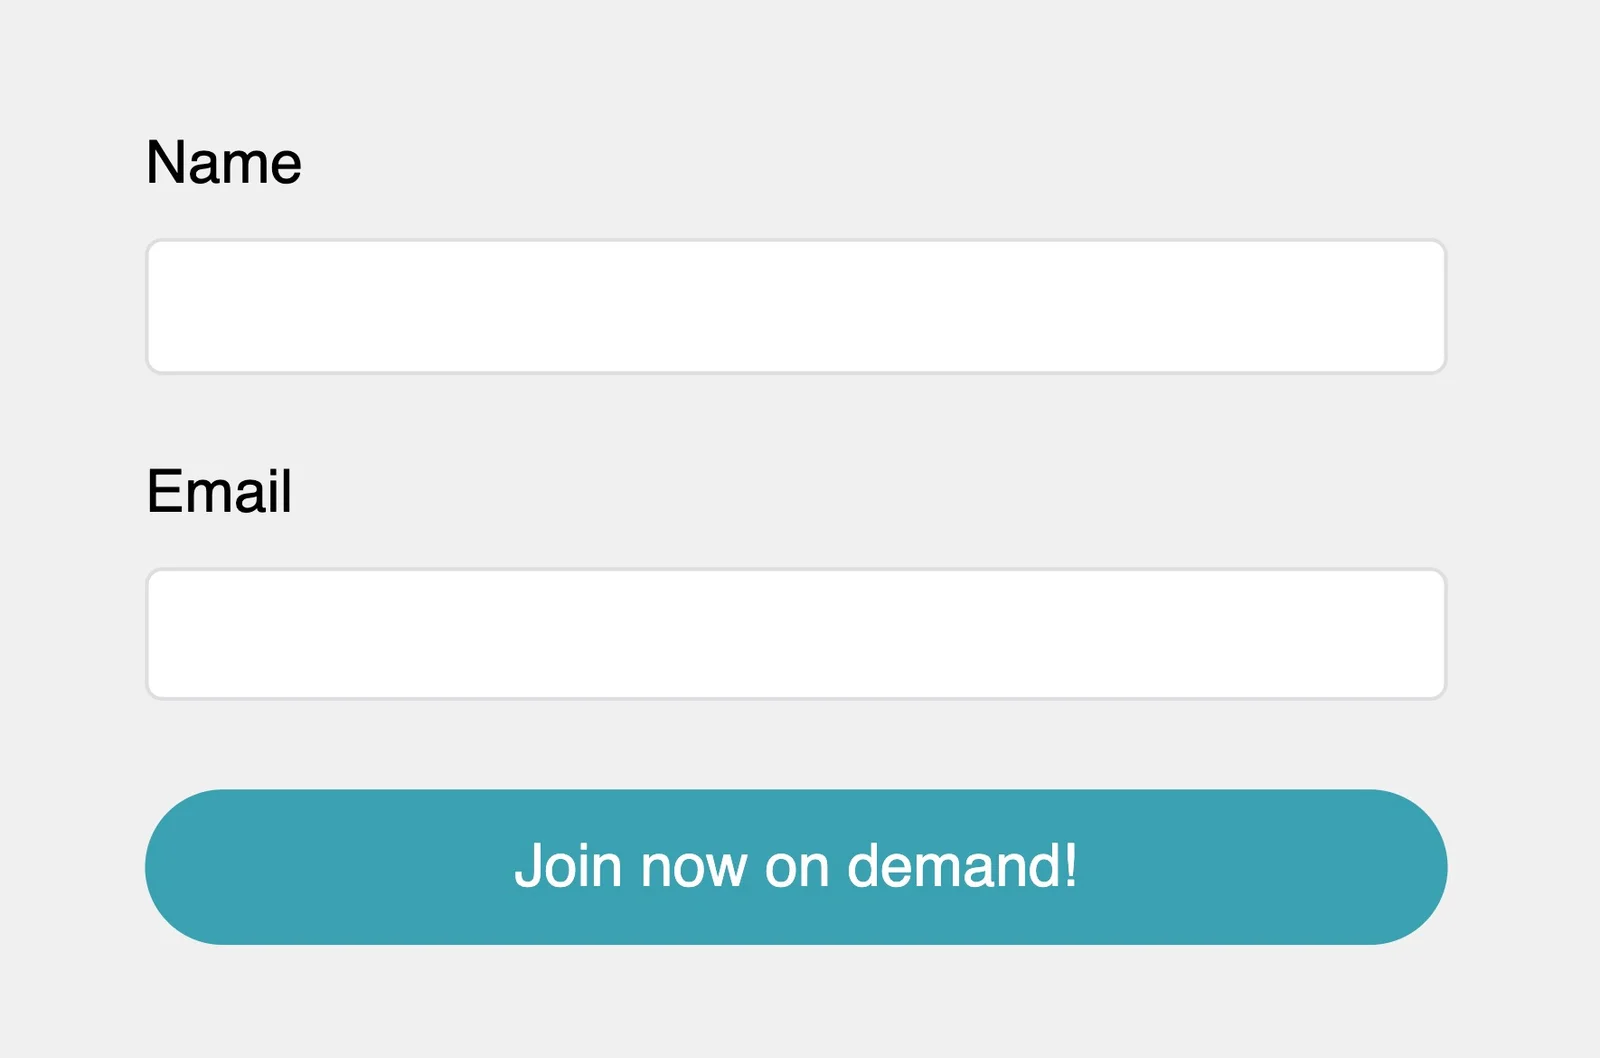
Alternatively, you can choose to show your full registration form, however that was up when you created your webinar, including the ability for registrants to choose the session they want to attend.
Fixed bar widget
The Fixed bar widget is typically used as the main widget of any webinar registration page. This is because it is always visible as it stays fixed to the bottom of the page as people scroll: with a countdown timer to your next webinar session!

The Fixed bar widget is often used in combination with the Button widget or Embedded form widget, so that there are multiple places on your landing page for someone to register for your webinar.
Button widget
The Button widget lets leads register for your eWebinar without navigating away from your page, by opening the registration form in a modal window when clicked.
Auto-register your attendees via Zapier
If you prefer not to use our widgets and want to capture registrant information outside of eWebinar, you can auto-register attendees for you webinars via Zapier. Keep in mind, a pre-requisite for doing this is to send notification emails from your own domain (rather than through eWebinar) by integrating with SendGrid or the SMTP service of a third-party email provider.
Read this article to learn more:
2. Widgets for registration thank you pages
There are two types of widgets you can use when creating a custom thank you page: the page registrants are sent to after they've successfully submitted your registration form. They are a Card widget and Button widget.
Session card (for registration thank you pages)
Most people should use the Session card widget for their registration thank you pages, since it has all the logic built into it that is necessary to display the right button to the registrant, whether that's a button for them to join a session starting right away, watch a replay, or add a future session to their calendar .
The card widget also shows the date and time of the session the user signed up for, and includes a link for them to join their session.
Thank you CTA widget (for registration thank you pages)
The Thank you CTA widget gives you the freedom to customize the look of your thank you page completely, but requires coding on your part to do so effectively.
This widget simply shows a button. All other information is available as query parameters as on the URL but are not shown. (Again, this requires custom coding, though we do provide a code snippet when you choose to use your own Thank You pages that will help you decrypt the URL parameters)
The button widget is a smart button that lets the registrant:
- Click to watch a replay if they registered for one
- Join a session immediately if it is starting soon
- Add their session to a calendar if it is in the future
Important note about testing thank you widgets
If you want to test a thank you widget after installing it, be aware that if you navigate to the thank you page directly, the widget will not have the registration form data required to display correctly and it will look like it doesn't work.
To test a thank you widget, you must fill out the registration form and be taken to the thank you page as the result of completing the registration.
3. Widgets for website pages and blogs
There are two types of widgets ideal for your main website or blog. They are a Pop-up widget and Card widget.
Pop-up widget
The Pop-up widget is the most popular widget used by eWebinar customers. It surfaces your webinar to visitors and prospects in a way that's easily discoverable but not obtrusive. It appears at the bottom of the screen and can be configured to show up on the left side, right side, or in the middle, with different options for desktop and mobile.
The pop-up widget automatically shows the title of your webinar even if you change it after installing the widget. Note it will instead show the social sharing title if you entered it in your webinar's Settings tab. Also note the widget will not show if there are no sessions available to register for.
Card widget
The Card widget allows you to promote your webinar as part of an existing piece of content, like a blog post or landing page.
Check out this article from our blog as an example of how to use this widget. You'll see we have embedded three different places, near the beginning, in the middle, and at the end, to promote our on-demand demo.
You can also use card widget to create a custom webpage or landing page listing all of your available webinars, like we did with our webinar library.
The card widget has the HTML required to render the card within it. That means if you change the social sharing title or description of your webinar you'll have to re-generate the widget code, copy and replace any existing cards to have the information update.
CONFIGURE, INSTALL & CUSTOMIZE THE WIDGET
Configure the widget
Though each widget has its own unique settings, the process of configuring a widget is the same for all of them. Here is how to do it:
- Open the Widget dialog box for the webinar in question by clicking Widgets.
- Select the type of page the widget is for, a Registration or Marketing page or a Thank you confirmation page.
- Next, select the style of widget you would like to use, from the available choices. When you do, you will see a preview of the widget appear on the left
- Configure the settings of the widget. As you configure the widget, you will see the preview on the left update accordingly.
- Copy and paste the code into the body of the HTML for your website. You may need help from your IT administrator for this step or from the support team of whatever third-party page builder you are using, like LeadPages or SquareSpace.
Below is an example of what the pop-up widget looks like after being configured. The next step here would be to copy the code and paste into the code of the page where you would like the pop-up to appear.
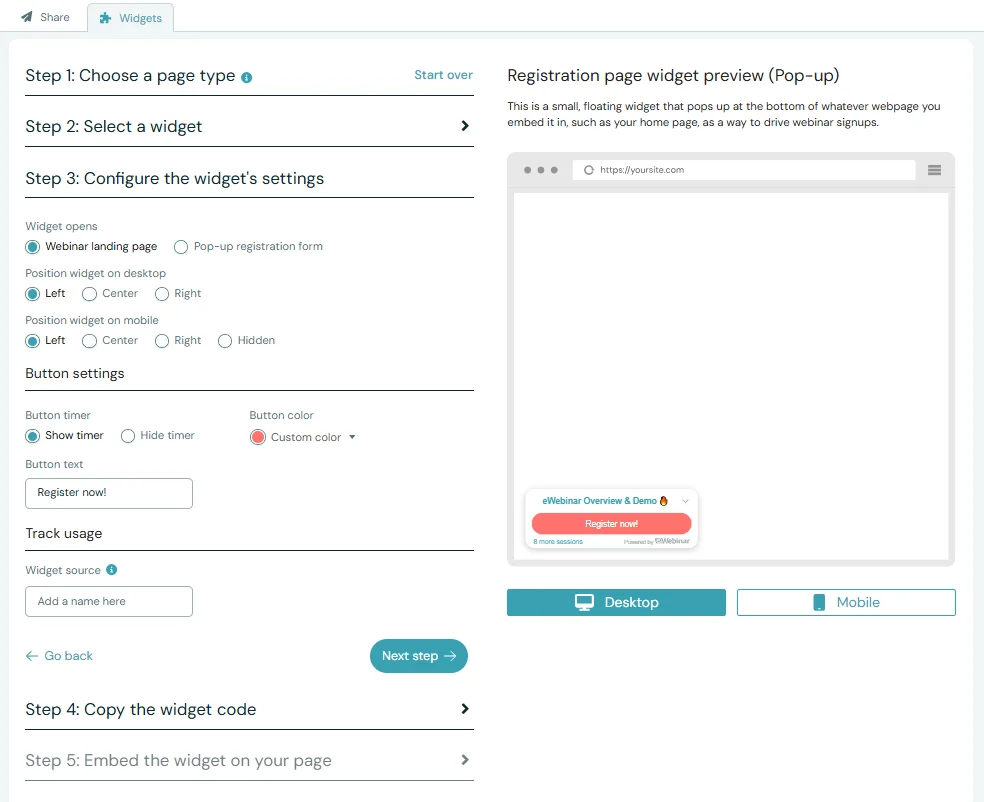
In this case, the pop-up widget shown above has been configured as follows:
- To appear on the left-hand side of the bottom of the screen on desktop
- To appear in the center of the bottom of the screen on mobile
- For the registration form to open up on the page itself, so the registrant doesn't need to go somewhere else first before registering
- For the button text to say 'Join the next demo!'
- For the Widget source to be called 'homepage': so that when someone registers via this widget, I'll be able to see which widget who it was
Install the widget
Though the installation process for widgets will vary based on the third-party page builder you use, the workflow is essentially the same.
As an example, here is a short video showing the process of installing the Embed form in a Hubspot landing page, to give you an idea of what to expect:
We highly recommend you add eWebinar widgets directly into your page and not in an IFRAME. If you do put it in an IFRAME, you must turn on the "Open next page in new window" option. Note, however, in many cases the new window will be blocked as a pop-up and registrants may not notice it.
For most webpage builders, it is fairly straightforward to add custom HTML code inside the <body> tag of your page and have that work automatically. If you would like to see another example, look at these installation guides for Wordpress and SquareSpace.
Customize your widget
If after installing one or more widgets onto your page you need to further customize the look of it, CSS is your friend.
Every part of an eWebinar widget uses a different class name. This means you can specify custom CSS to override colors, fonts, sizes or even hide specific parts of a widget. What you should never do is remove code from within the widget HTML you copy/paste as that could break your widget as we update the eWebinar service.
Following are some examples of custom CSS for the more popular customizations.
Change the font & size of all Registration buttons
<style>
  .ewebinar__RegisterButton {
    font-family: 'pragmatica', sans-serif !important;
    font-size: 30px !important;
  }
</style>
Change the font size of a particular Registration buton
<style>
  #w1627034837426 .ewebinar__RegisterButton {
    font-size: 30px;
  }
</style>
Remove the minimize button from the pop-up widget
<style>
  .ewebinar__FloatIn__Cross {
    display: none;
  }
</style>
Change the font color of field labels in the embed form to white
<style>
  .ewebinar__RegForm__Field__Label {
    color: #fff;
  }
</style>
Updating the widget
If you are having any issues with updating your widgets, it is important to know that you must reconfigure your widget in the same way you originally did in these steps, while still changing the relevant settings for the update. Please get a newly generated widget code from your dashboard and replace the one you're currently using. You must rembed the widget by following the instructions for installing it as you did previously.
Why does my widget not update itself when I update the title of my webinar?
Here we explain how to troubleshoot and fix when the 'Pop-up widget' or 'Card widget' does not update itself automatically after changing the title of your eWebinar. If you are wondering why, after changing the title of your webinar, your marketing widget did not update itself automatically, there are two things that may be going on, depending on whether you used the Pop-up widget or the Card widget.
1. Pop-up widget
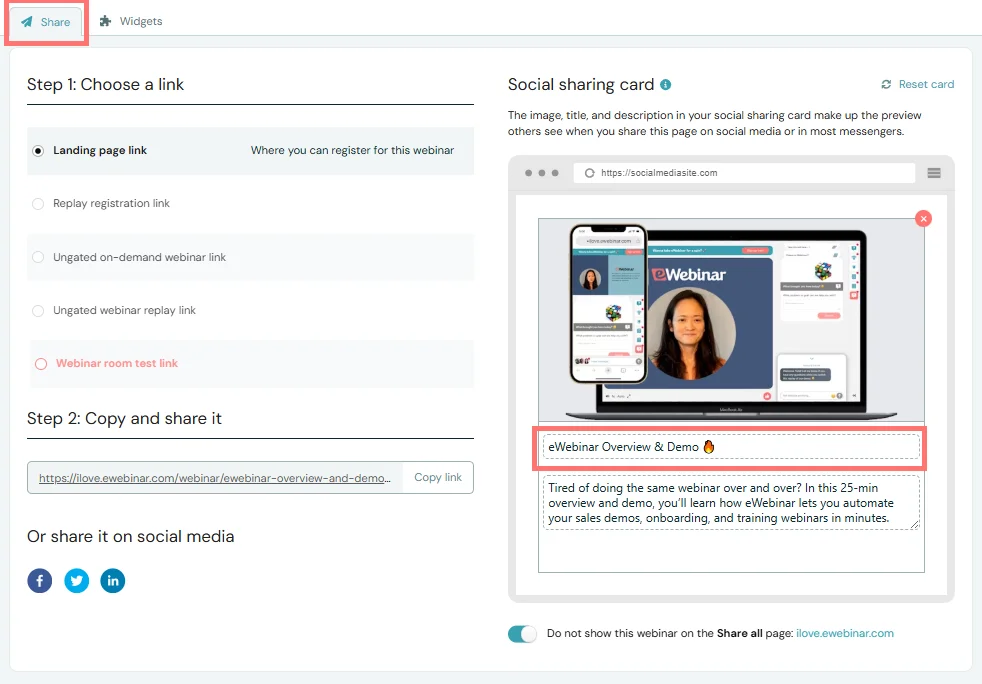
The Pop-up widget automatically draws its title from your Sharing settings, if the title has been defined there.
To update your webinar's title in your Sharing settings, press Share on the webinar that you would like to edit the title of, and update the title of your eWebinar on the right side of the page.
2. Card widget
The Card widget must be manually updated after you change the title of your webinar. To do this, you must configure and install the card widget again.