If you wish to charge people to attend one of your webinars, you can use eWebinar in combination with a third-party payment processor like Paypal, Stripe, or EventBrite to prevent people from registering for your webinar unless they purchase it first.
Here’s what is covered in this article if you’d like to skip ahead:
Three options for setting up your webinar for purchase
Here are the 3 approaches you can take when setting up an eWebinar for purchase:
- Option 1: Redirect to your eWebinar registration page after purchase
- Option 2: Auto-register attendees after purchase
- Option 3: Auto-register attendees for a scheduled session after purchase (EventBrite)
All three options require integrating with a third-party payment processor. Options 2 and 3 require also integrating with Zapier and a third-party email service.
Here are the pre-requisite integrations for each option:
|
Payment Processor (e.g. PayPal, Stripe) |
Email Platform (SMTP or SendGrid) |
Zapier |
|
| OPTION 1 | Yes | No | No |
| OPTION 2 | Yes | Yes | Yes |
| OPTION 3 | Yes | Yes | Yes |
To go with Option 2 or 3, you must first integrate with a third-party email platform to send your attendee notifications.
Here are instructions for two ways to do that:
- How do I integrate eWebinar with an SMTP service in order to send notifications to attendees from my email platform of choice? *
- What is eWebinar's integration with SendGrid and how do I set it up?
* Every major email platform supports an SMTP integration.
The following article will also be helpful, since it explains why we require you to integrate with a third-party email platform and has additional tips for how to send sessions times to Zapier:
Additional Notes:
For Options 1 and 2, you should be able to use pretty much any available solution, like PayPal, Kartra, or Stripe, though the specific instructions we have included are for PayPal only. Work with the support team of the software you decide upon to figure out how to set up things in their system. Reading the PayPal instructions will help.
Option 3 is specifically for use with EventBrite, though there may be other event-based payment processors who could support an option like this.
Option 1: Redirect to your eWebinar registration page after purchase
The first option is to allow people to register for a session themselves after they have paid. For this approach, you’ll need to build your own custom landing page outside of eWebinar, but also use eWebinar’s registration and thank you pages.
Here is a high-level summary of what you would need to do:
- Use a third-party payment processor to create a checkout page that you can share or link to from a custom landing page advertising your webinar
- Have the payment processor redirect to your eWebinar registration page after a successful transaction so the purchaser can register for a session themselves
Pros: Easy to set up, since it does not require an integration using Zapier
Works with any type of session (scheduled, just-in-time, or replay)
Cons: It still requires people to register after they purchase
It is the least secure option since the registration page could be shared with people who did not pay
Option 2: Auto-register attendees to watch a replay via Zapier after purchase
The second option lets you automatically register attendees to watch a replay after they pay. This approach will require you to build your own custom registration and thank you pages outside of eWebinar.
Here is a high-level summary of what you would need to do:
- Integrate with a third-party email platform like SendGrid or via an SMTP service (as a pre-requisite)
- Use a third-party payment processor to create a checkout page that you can share or link to from a custom landing page advertising your webinar
- Use Zapier to integrate eWebinar with your payment processor to automatically register people for a replay after they purchase your webinar
- Take purchasers to a custom thank you page immediately after the transaction to let them know they’ll be getting an email with a replay link to watch the webinar
Pro: Seamlessly registers someone automatically after paying
Con: Only works with replays
Option 3: Auto-register attendees for a scheduled session after purchase with EventBrite
The third option is very similar to Option 2 but lets you automatically register attendees for a specific session from an event created using EventBrite. In this approach, you can either use the event page from EventBrite to advertise your webinar or link to it from a custom landing page you build elsewhere.
Here is a high-level summary of what you would need to do:
- Integrate with a third-party email platform like SendGrid or via an SMTP service (as a pre-requisite)
- Use EventBrite to create an online event with a recurring schedule
- Advertise your event using the EventBrite event page or link to it from a custom landing page
- Use Zapier to integrate eWebinar with EventBrite to automatically register people for the session time they chose in EventBrite after they purchase your webinar
- Customize the Order Confirmation page and email in EventBrite to let purchasers know they’ll be getting an email with a join link to watch their session
Pros: Seamlessly registers someone automatically after paying
Works with scheduled sessions
Cons: Does not work with replays or just-in-time sessions
Sessions won’t appear in the attendee’s local time zone
Examples of set up instructions for all three options
Below are instructions for how to set up all three options for making your webinar available for purchase using specific third-party payment processors (PayPal and EventBrite) as examples. These instructions should work for most payment processors, though you may need to work with that software's support team to figure out exactly how to set up the integration.
How to set up Option 1 using PayPal
Follow these instructions to redirect purchasers to your registration page after they purchase your webinar in PayPal.
Part 1: Setup in eWebinar
When you create your webinar in eWebinar, do the following on the tabs listed below:
1. Schedule tab
Schedule your eWebinar however you like. Just remember, since people won’t be able to choose a session until after they purchase your webinar, you’ll need to communicate clearly on your custom landing page when sessions will be available.
We recommend you set replay links to expire after a few days (which you can do under Replays) if you wish to include them in your follow-up emails to discourage people from sharing the links with others. If you choose to do this, be sure to communicate that links are only valid for a short period of time in your email notifications (which you can customize on the Notifications tab.)
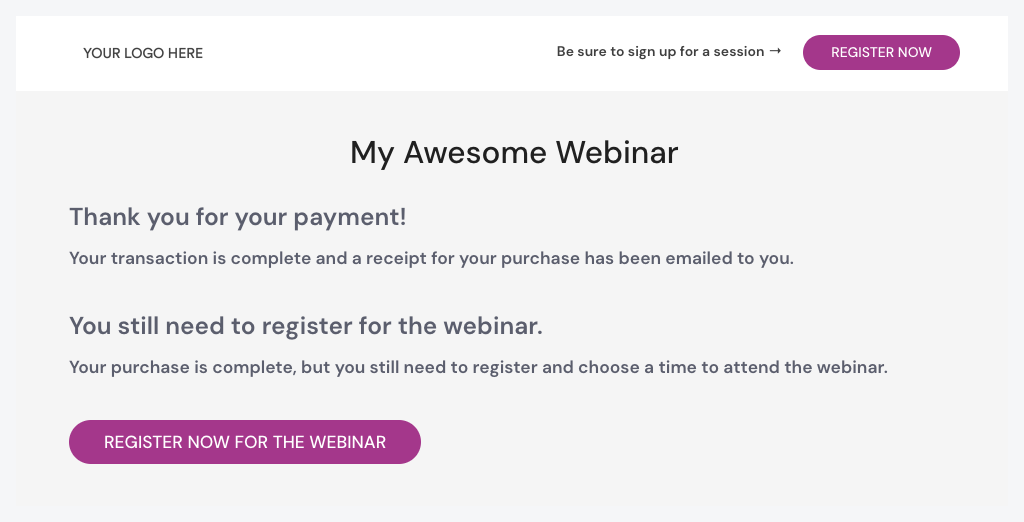
2. Registration tabSince you will be using a custom landing page built outside of eWebinar to advertise your webinar, the purpose of the eWebinar registration page is to simply communicate two points:
- The transaction is complete
- They still need to register
Here's an example of how that might look:
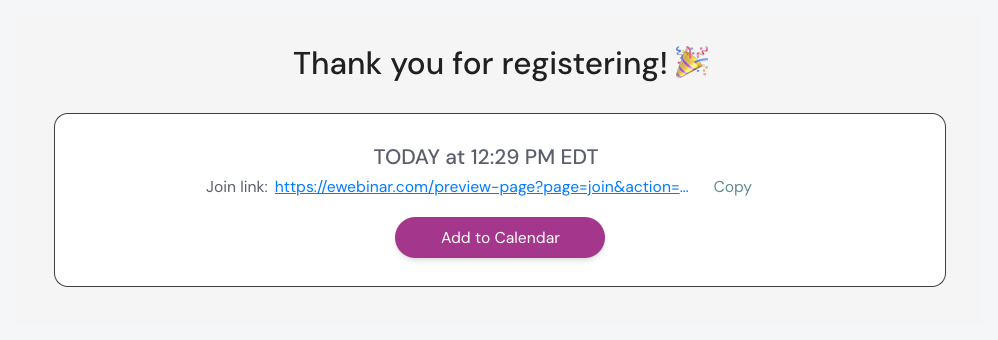
The purpose of your eWebinar thank you page is to communicate they’ve registered:
Be mindful not to share the link to your eWebinar registration page, since that would allow people to register for your webinar without purchasing. Instead, only share the link to your custom landing page.
Part 2: Setup in PayPal
The steps below explain how to set things up in PayPal and get what you need to build your custom landing page.
1. Login to PayPal, go to your account's settings, then Seller Tools, then Paypal buttons, and there you can make a new PayPal Button, and configure a “Buy Now” button as follows.2. When filling out the initial settings (see the screenshot), specify the Item name and Price of your webinar

3. Skip the optional tracking settings.
4. For the rest of the optional settings:
a. Turn off the need to collect the customer’s shipping address.
b. Check Take customers to this URL when they cancel their checkout and enter the link to your custom landing page, so they’ll be taken back to where they started if they cancel their checkout
c. Check Take customers to this URL when they finish checkout and enter the link to your eWebinar registration page.

NOTE: Purchasers are not taken to the URL you specify automatically after they finish checking out. They must click “Return to Merchant”. You may wish to mention this on your custom landing page. (i.e. “When your transaction is complete, be sure to click Return to Merchant to register for a session.”)
5. Click Create Button and then do one of the following:
a. Go to the Website tab, copy the code, and paste it into the code of your custom landing page

b. Go to the Email tab, copy the link, and share it however you choose or configure a button with it on your custom landing page.

How to set up Option 2 using PayPal
Follow these instructions to set up an integration between PayPal and eWebinar using Zapier that will automatically register people to watch a replay of your webinar immediately after they purchase it.
Before you do, however, as a pre-requisite, you must first integrate with SendGrid or another email platform via an SMTP service to send out your email notifications:
You may also find this article helpful, since it explains why we require you to integrate with a third-party email platform and has additional tips for how to send sessions times to Zapier (as a supplement to the instructions below):
Once you have set up your email platform integration, proceed with the following instructions:
Part 1: Setup in eWebinar
When you create your webinar in eWebinar, do the following on the tabs listed below:
1. Schedule tab
Even though people will never be registered for anything but a replay, the system currently requires you to set a recurring schedule. So set the Start date to Today, the End date to Never, and add at least one day of the week and one start time.
We also recommend you set replay links to expire after a few days (which you can do under Replays) to discourage people from sharing the links with others. If you choose to do this, be sure to communicate that links are only valid for a short period of time. A good place to do that is on your custom landing and thank you pages and in the confirmation email for replays (which you can customize on the Notifications tab.)
2. Registration tab
Enable Use my own registration page and paste in the link to the landing page you created outside of eWebinar. This will make the link available to you from the Share button of your eWebinar on the home page and also make sure the right link is surfaced when it is supposed to. (Enabling the custom thank you page is not necessary.)
Part 2: Setup in PayPal
The steps below explain how to set things up in PayPal and get what you need to build your custom landing page.
1. Login to PayPal, go to where you can make a new PayPal Button, and configure a “Buy Now” button as follows.
2. Under Step 1 in PayPal, specify the Item name and Price of your webinar

3. Skip Step 2 in PayPal.
4. Under Step 3 in PayPal
a. Turn off the need to collect the customer’s shipping address.
b. Check Take customers to this URL when they cancel their checkout and enter the link to your custom landing page, so they’ll be taken back to where they started if they cancel their checkout
c. Check Take customers to this URL when they finish checkout and enter the link to your custom thank you page

How you redirect purchasers to your custom thank you page will be different with every payment processor. What’s most important is to communicate three things on that page:
- The transaction is complete and a receipt has been emailed
- A separate email will be sent with a link to watch the webinar
- The replay link they get will expire after X number of days (if it will)
5. Click Create Button and then do one of the following:
-
-
Go to the Website tab, copy the code, and paste it into the code of your custom landing page
-
b. Go to the Email tab, copy the link, and share it however you choose or configure a button with it on your custom landing page

Part 2: Set up in Zapier (and PayPal and eWebinar)
1. Login to Zapier and create a Zap.
2. In Step 1 of creating the Zap:
a. Under Choose app & event, select PayPal as the app and Successful Sale (without line item support) as the Trigger Event

b. Under Set up webhook, copy the webhook URL, go back to PayPal, and:
i. Go to Seller Tools in your Account Settings and click on Instant Payment Notifications under Selling online
ii. Paste the webhook URL into the Notification URL field (You can also configure the Notification URL in your PayPal Button.)
iii. Click Save
%20settings%20-%20PayPal.png?width=580&height=338&name=Edit%20Instant%20Payment%20Notification%20(IPN)%20settings%20-%20PayPal.png)
3. Return to Zapier, test your trigger, and continue to Step 2
4. In Step 2 of creating the Zap:
a. Under Choose app & event, select eWebinar as the app and Register Attendee as the Action Event

b. Under Choose account, connect to your eWebinar account. When you do, you’ll be prompted to enter an API key. To find it, go to eWebinar and:
i. Click Integrations in the Profile menu
ii. Click Zapier
iii. Copy the API key
iv. Return to Zapier and paste it into the available field
c. Under Set up action:
i. Select your eWebinar, which will be pre-populated from your account
ii. Map the following fields from PayPal to eWebinar:
First Name → First Name
Last Name → Last Name
Email → Payer Email
Session → replay (case-sensitive)

d. Test the action and turn on the Zap.
NOTE: If you wish to sell more than one webinar, you’ll need to create a different Zap for each and add a Zapier filter between Steps 1 and 2 that checks to see that the “Item Names” field from PayPal exactly matches the name of your webinar.
How to set up Option 3 using EventBrite
Follow these instructions to set up an integration between EventBrite and eWebinar using Zapier that will automatically register people to watch a particular scheduled session of your webinar immediately after they purchase it.
Before you do, however, as a pre-requisite, you must first integrate with SendGrid or another email platform via an SMTP service to send out your email notifications:
You may also find this article helpful, since it explains why we require you to integrate with a third-party email platform and has additional tips for how to send sessions times to Zapier (as a supplement to the instructions below):
Once you have set up your email platform integration, proceed with the following instructions:
Part 1: Setup in eWebinar
When you create your webinar in eWebinar, do the following on the tabs listed below:
1. Schedule tabEven though people will only be able to choose to register for sessions in EventBrite, the system currently requires you to set a recurring schedule. So set the Start date to Today, the End date to Never, and add at least one day of the week and one start time.
We recommend you set replay links to expire after a few days (which you can do under Replays) if you wish to include them in your follow-up emails to discourage people from sharing the links with others. If you choose to do this, be sure to communicate that links are only valid for a short period of time in the confirmation email for replays (which you can customize on the Notifications tab.)
2. Registration tabEnable Use my own registration page and paste in the link to your EventBrite event page (or the landing page you created outside of eWebinar). This is optional but, if you do it, will make the link available to you from the Links button of your eWebinar on the home page. (Enabling the custom thank you page is not necessary either.)
Part 2: Setup in EventBrite
The steps listed below not only explain how to set things up in EventBrite but also what you need to do and think about when setting up your custom landing page.
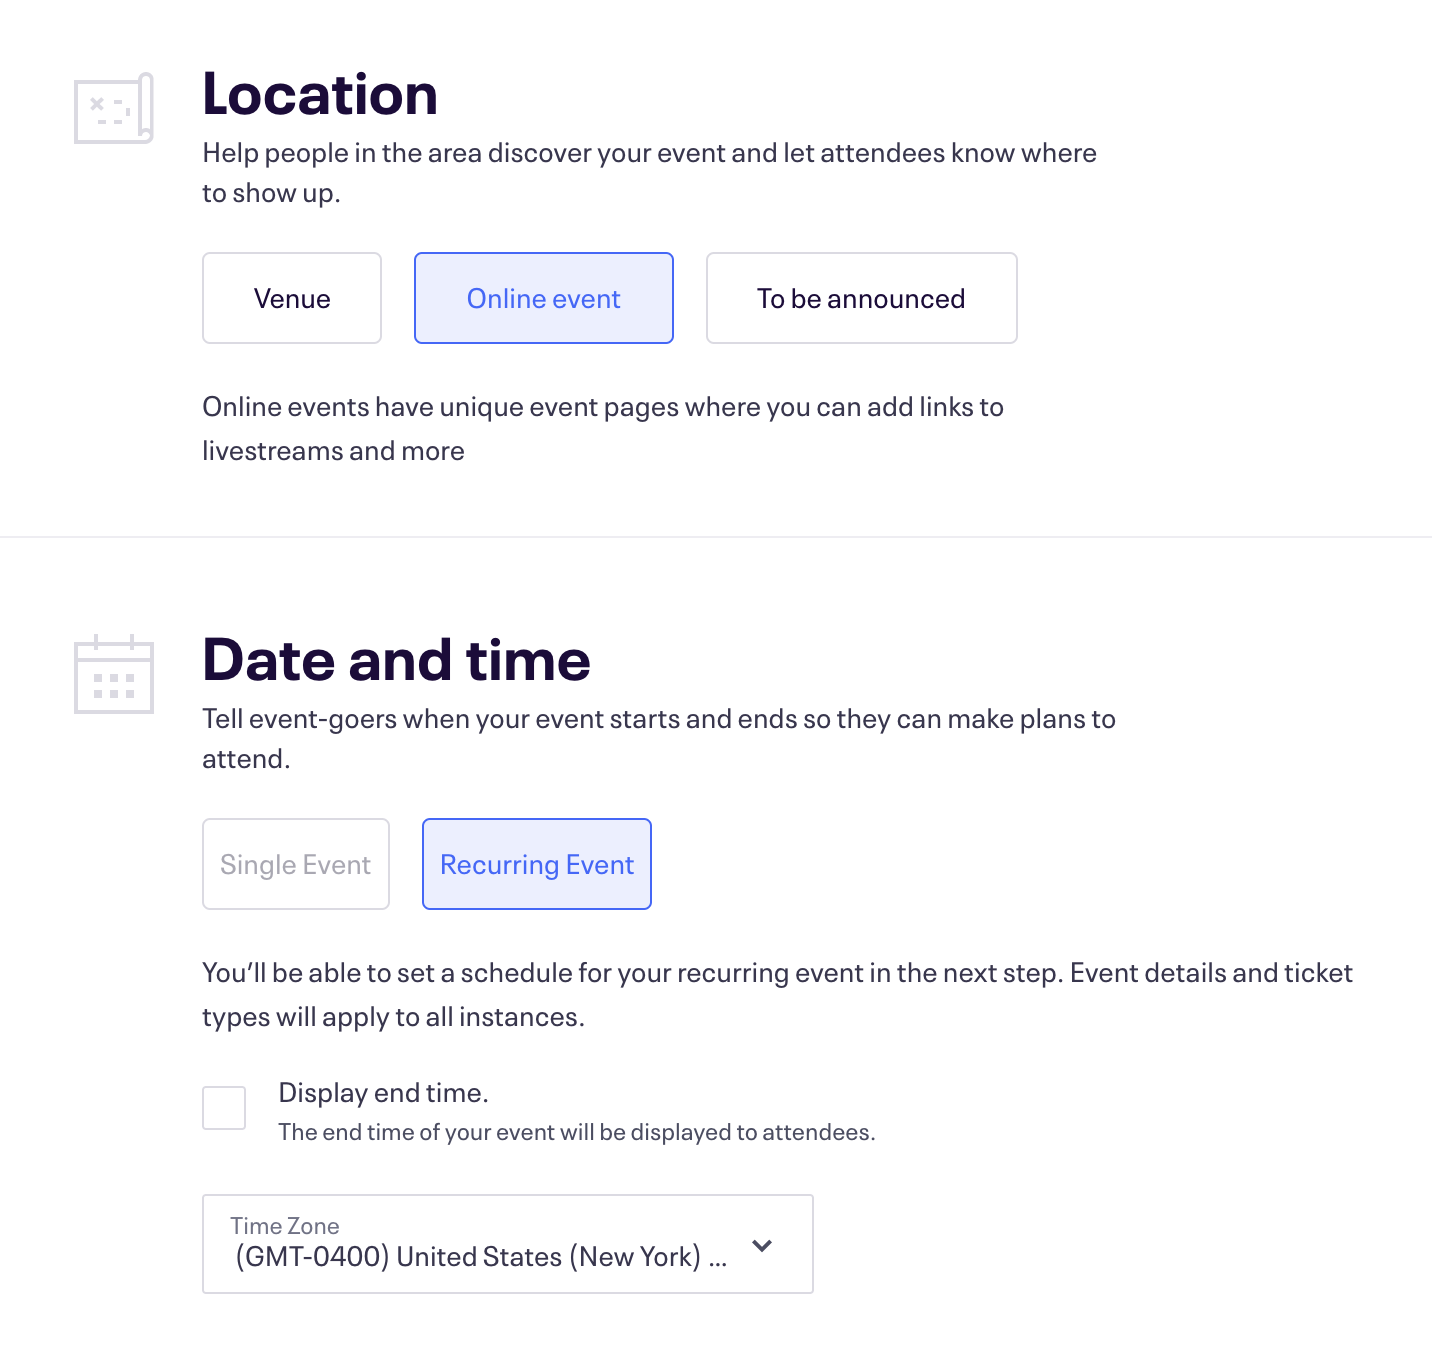
- Login to EventBrite and create a new event
- Under Basic Info, select Online Event under Location and Recurring Event under Date and Time
3. Under Schedule, create whatever recurring schedule you want. Keep in mind you can add multiple times on the same day.

4. Under Details, add whatever information you would like to appear on your EventBrite event page. You can advertise your webinar using this page or link to it from a custom registration page.
5. For Online Event Page, go to Page Settings on and disable the Attendee Event Page, since you will be using eWebinar for the webinar itself
6. Configure the name and price of your webinar under Tickets
7. Publish your event
8. Go to Order Options and click Order Confirmation
9. Configure the message on the Order Confirmation Page to communicate that the transaction is complete and that the link to join their session has been emailed to them.
10. You can also customize the Order Confirmation email to include this same information.
Part 2: Set up in Zapier
1. Login to Zapier and create a Zap
2. In Step 1 of creating the Zap:
a. Under Choose app & event, select EventBrite as the app and New Attendee Registered as the Trigger Event

b. Under Choose account, connect Zapier to your Eventbrite account by logging into it
c. Under Set up trigger, choose your Organization name in EventBrite and leave the Event field empty (so it applies to all events)
d. Test your trigger, and continue to step 2
3. In Step 2 of creating the Zap:
a. Under Choose app & event, select eWebinar as the app and Register Attendee as Action Event
b. Under Choose account, connect to your eWebinar account. When you do, you’ll be prompted to enter an API key. To find it, go to eWebinar and:
i. Click Integrations in the Profile menu
ii. Click Zapier
iii. Copy the API key
iv. Paste it into the available field in Zapier
c. Under Set up action:
i. Select your eWebinar, which will be pre-populated from your account
ii. Map the following fields from EventBrite to eWebinar:
Profile First Name → First Name
Profile Last Name → Last Name
Profile Email → Payer Email
Session → Event Start Utc

4. Test the action and turn on the Zap
NOTE: If you wish to sell more than one webinar, you’ll need to create a different Zap for each and add a Zapier filter between Steps 1 and 2 that checks to see that the “Event Name Text” from EventBrite exactly matches the name of your webinar.
Finally, keep in mind the instructions will be different for every payment processor. If you get stuck setting things up on the payment process side of things, work directly with their support team to figure it out.