eWebinar's integration with SendGrid allows you to send out email notifications to attendees via SendGrid rather than through eWebinar.
This has two main benefits:
1. You can send out emails from your own domain and no longer need to show "via eWebinar" in conjunction with the sender name on your emails, helping you create a fully branded experience.
2. It opens the door for you to auto-register people for your eWebinars using registrant data from a different application.
To learn more about how to auto-register people for your eWebinars (and why using a third-party email service is a prerequisite), read this article:
To set up eWebinar's integration with SendGrid, do the following:
1. Create an account in SendGrid and complete the account setup process, including authenticating your domain, which you can do by going to Settings → Sender Authentication. This step is necessary to prevent your email notifications from winding up in Spam.
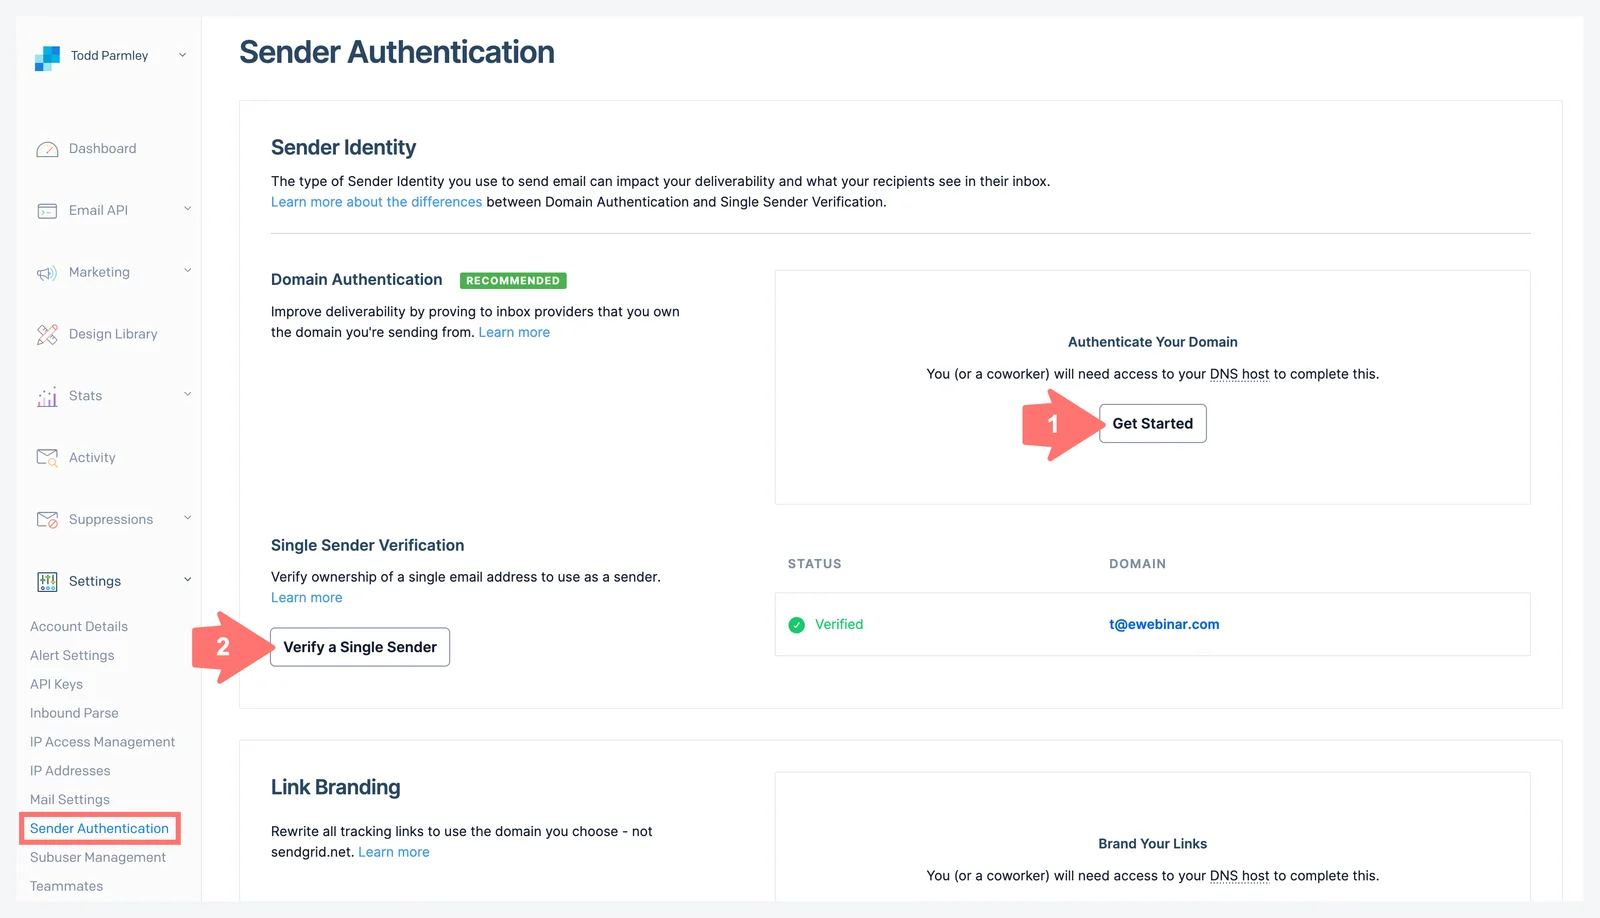
2. On the same page, use Single Sender Verification to verify a specific email address you would like to use to test that the integration has been successfully set up.
3. Go to Suppressions → Unsubscribe Groups and create an Unsubscribe Group to use in conjunction with your attendee notifications (or you can use an existing one).
4. Go to Settings → API Keys and create an API Key that at least has access to Mail Send, Sender Authentication, and Unsubscribe Groups, and copy it to your clipboard.
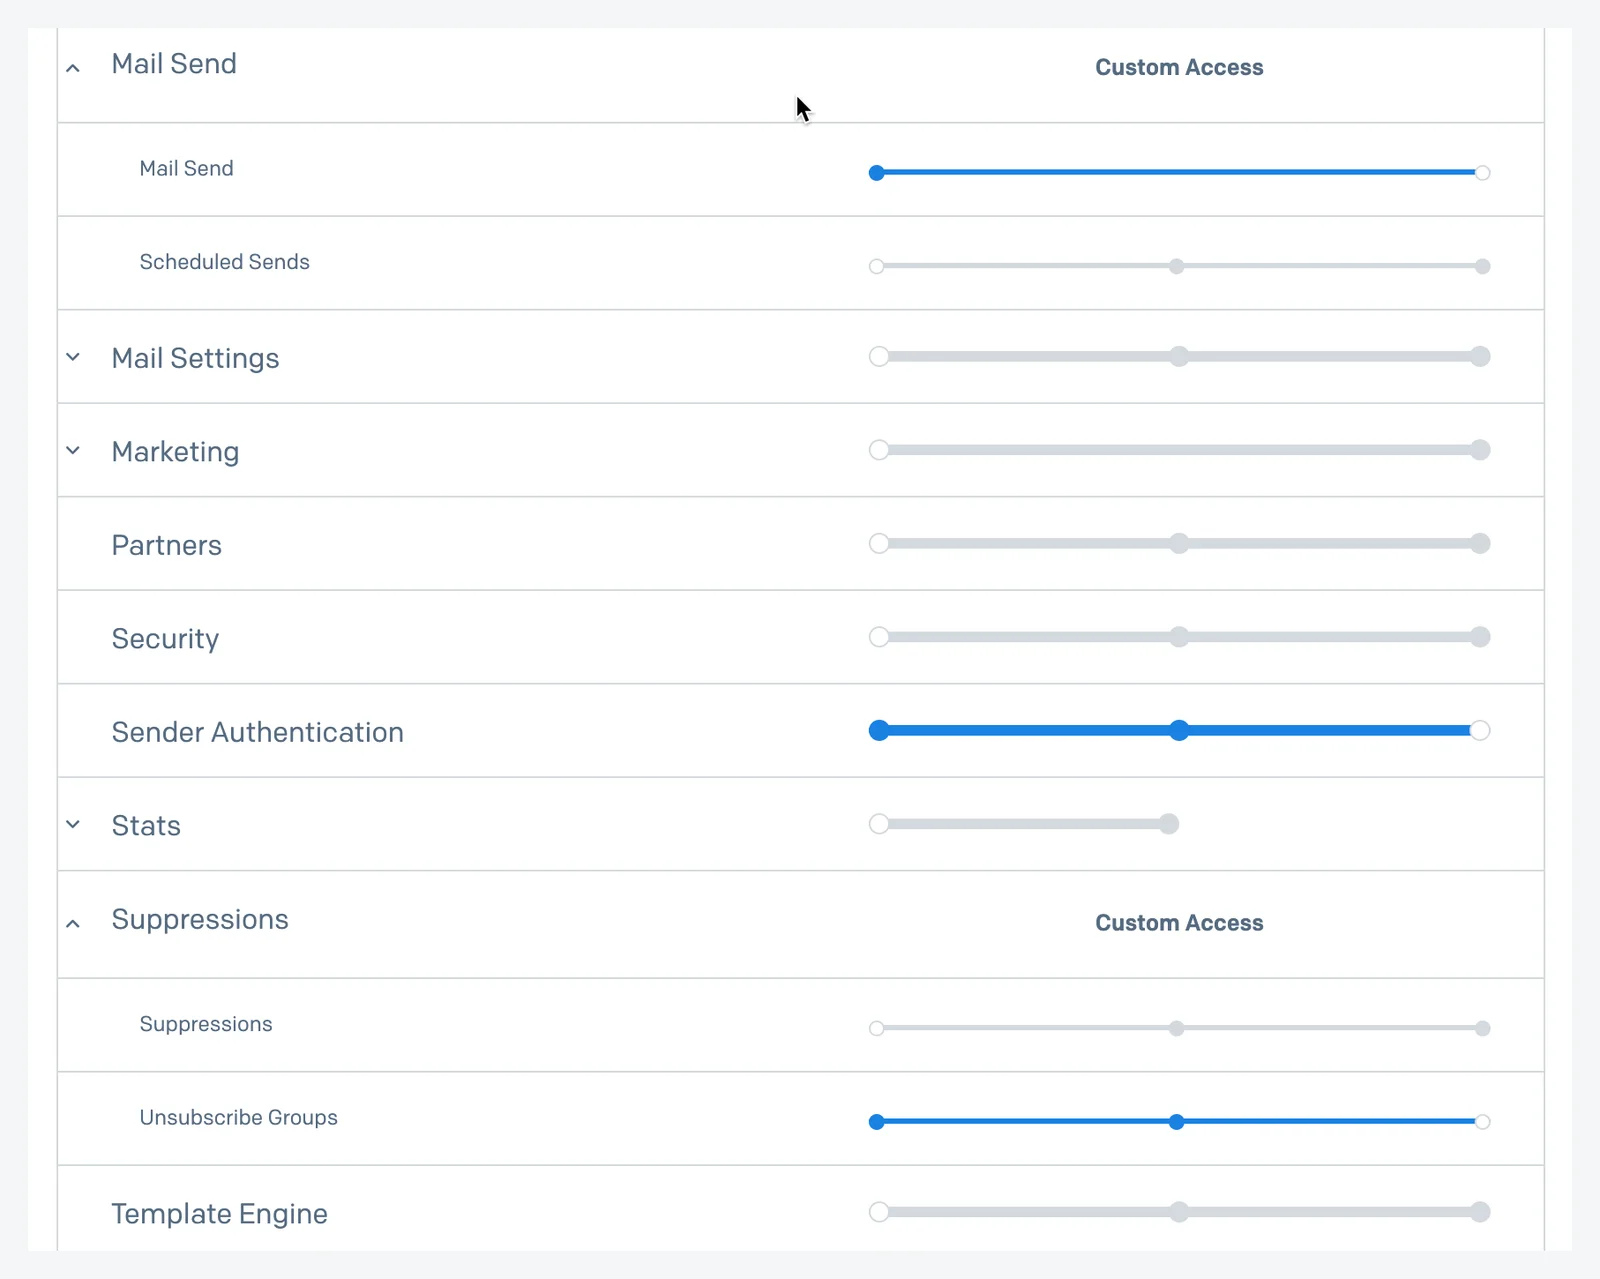
NOTE: You can always just create an API Key that grants Full Access, knowing that this integration only uses the three components listed above.
5. Login to eWebinar, go to the Integrations page, and click SendGrid under Available integrations.
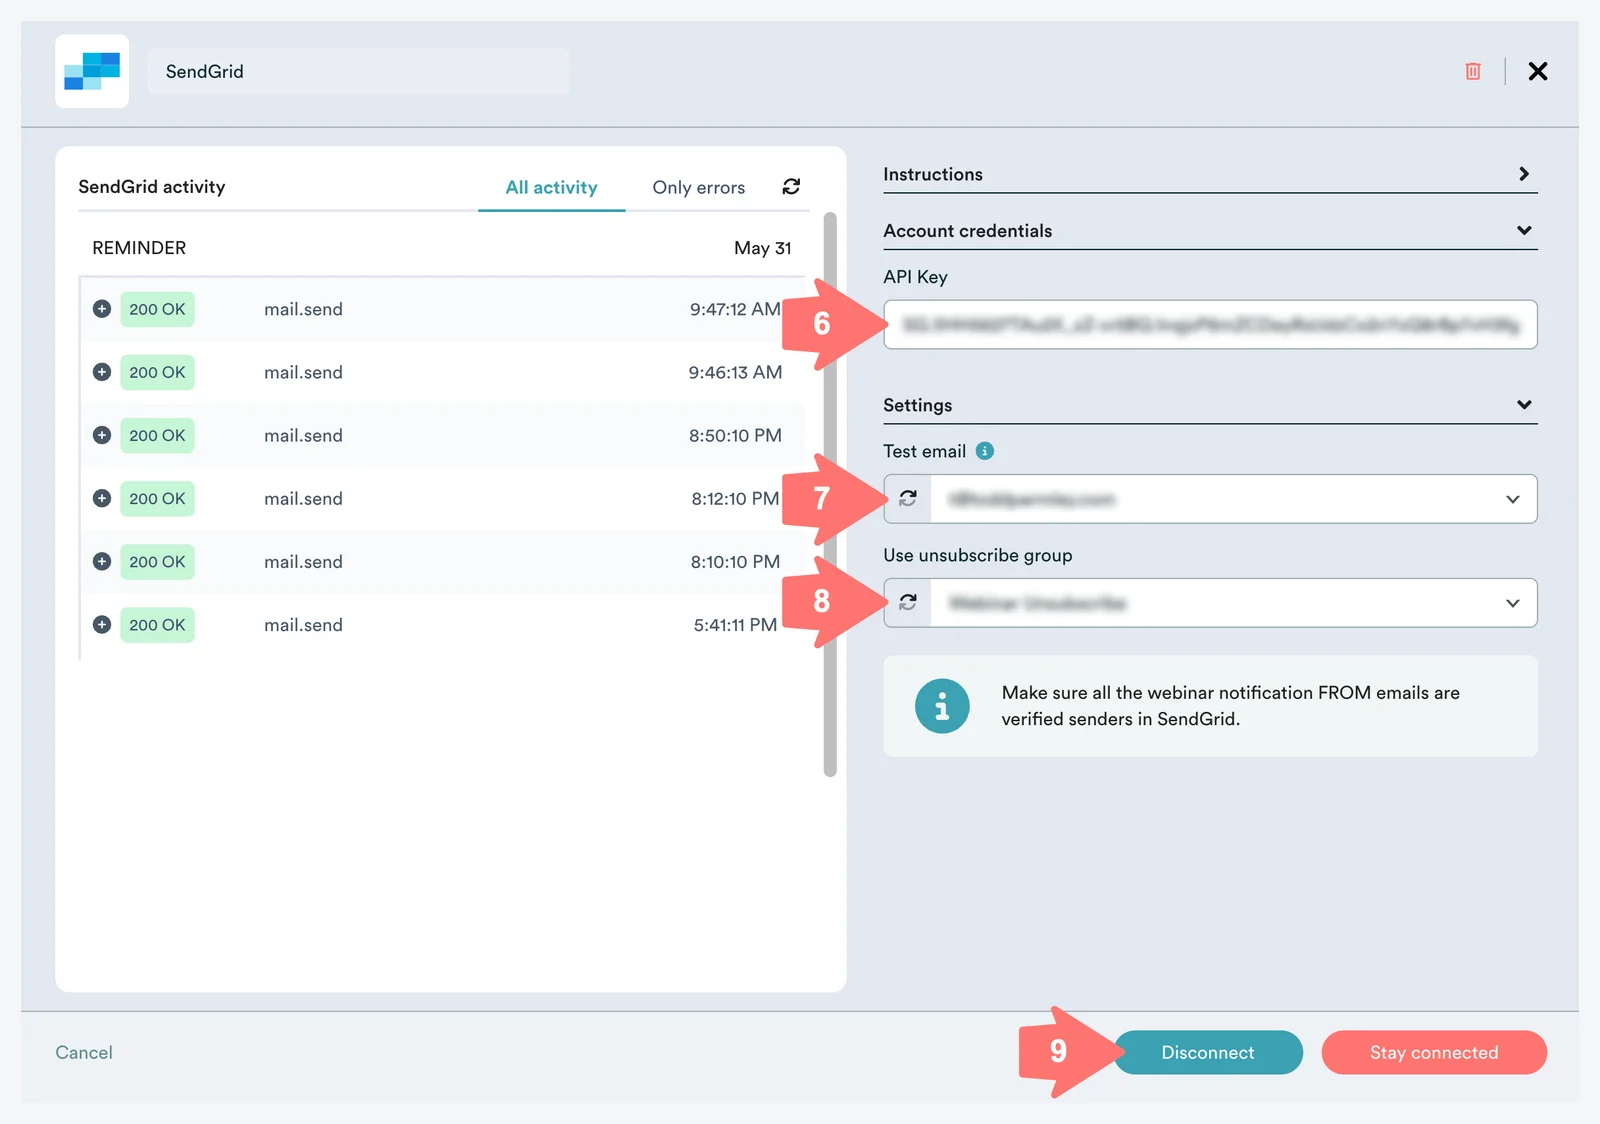
6. In the modal window that opens, paste the API Key from SendGrid into the field provided.
When you do, the drop-downs for SendGrid-verified test email and SendGrid unsubscribe group will become populated automatically with values from SendGrid.
7. Select a SendGrid-verified test email.
8. Select a SendGrid unsubscribe group.
9. Click Connect.
Shortly after you do this, you should receive an email (sent to the test email) confirming that the integration was set up successfully.
10. As a final step, verify that the From email on the Notifications tab of each of your eWebinars uses the same domain that you verified in SendGrid. Otherwise, the integration will not work.
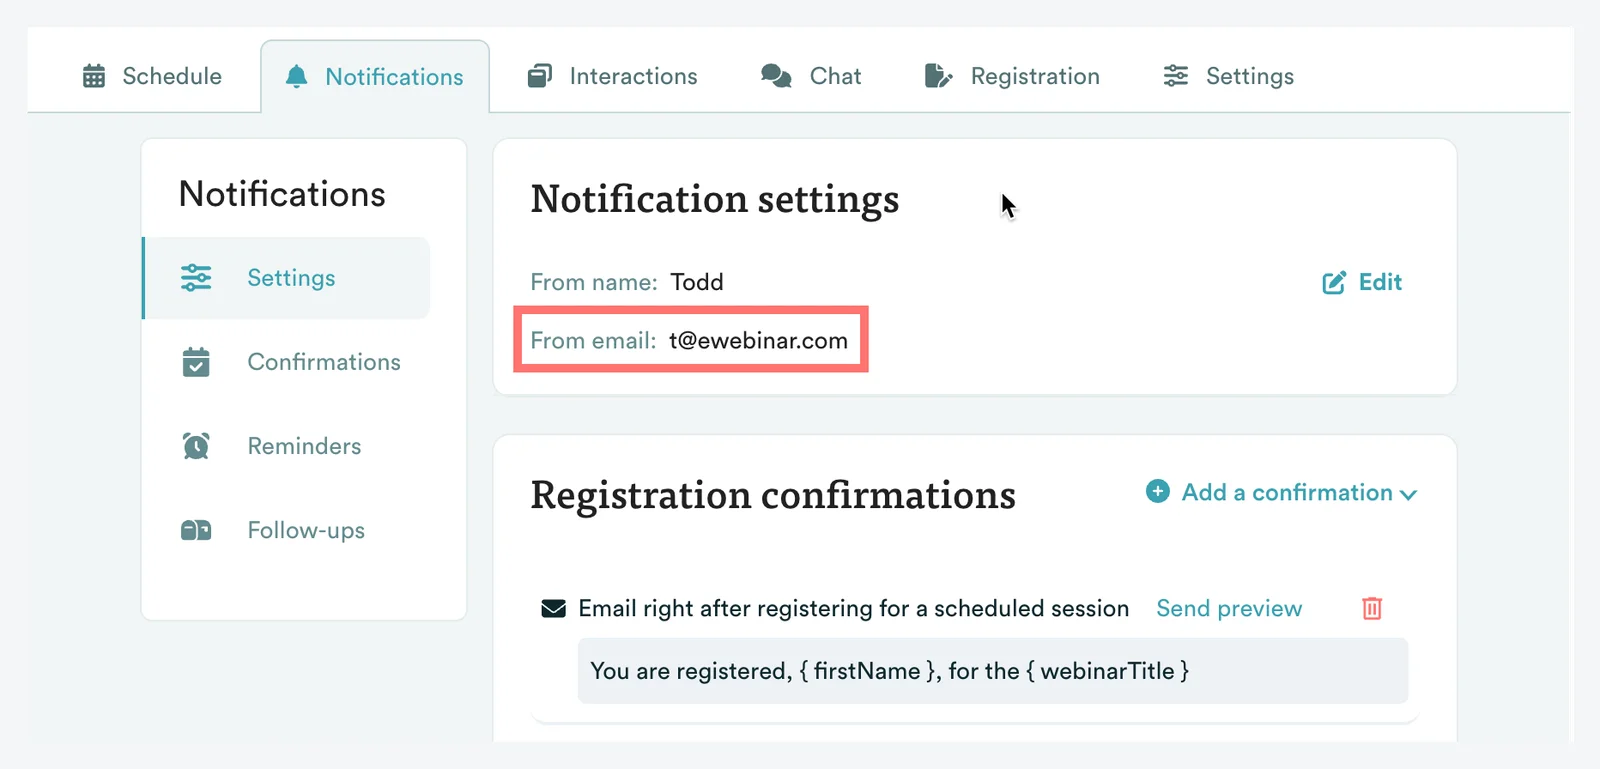
You can verify individual email addresses from an unverified domain and use them to send notifications. However, since notifications sent from an unverified domain are likely to end up in Spam, we recommend you only use email addresses with verified domains to send your notifications via SendGrid.