What does the Slack integration with eWebinar do?
With this integration, you can do the following from within Slack:
- Respond to chat messages from webinar attendees without logging in to eWebinar
- Keep an eye on who is joining your sessions
- See how attendees are responding to your interactions
Depending on how you've set it up, when an attendee either joins one of your webinars or sends you a chat message, a Slack message will be automatically generated in a dedicated channel, which in turn will trigger a Slack notification.
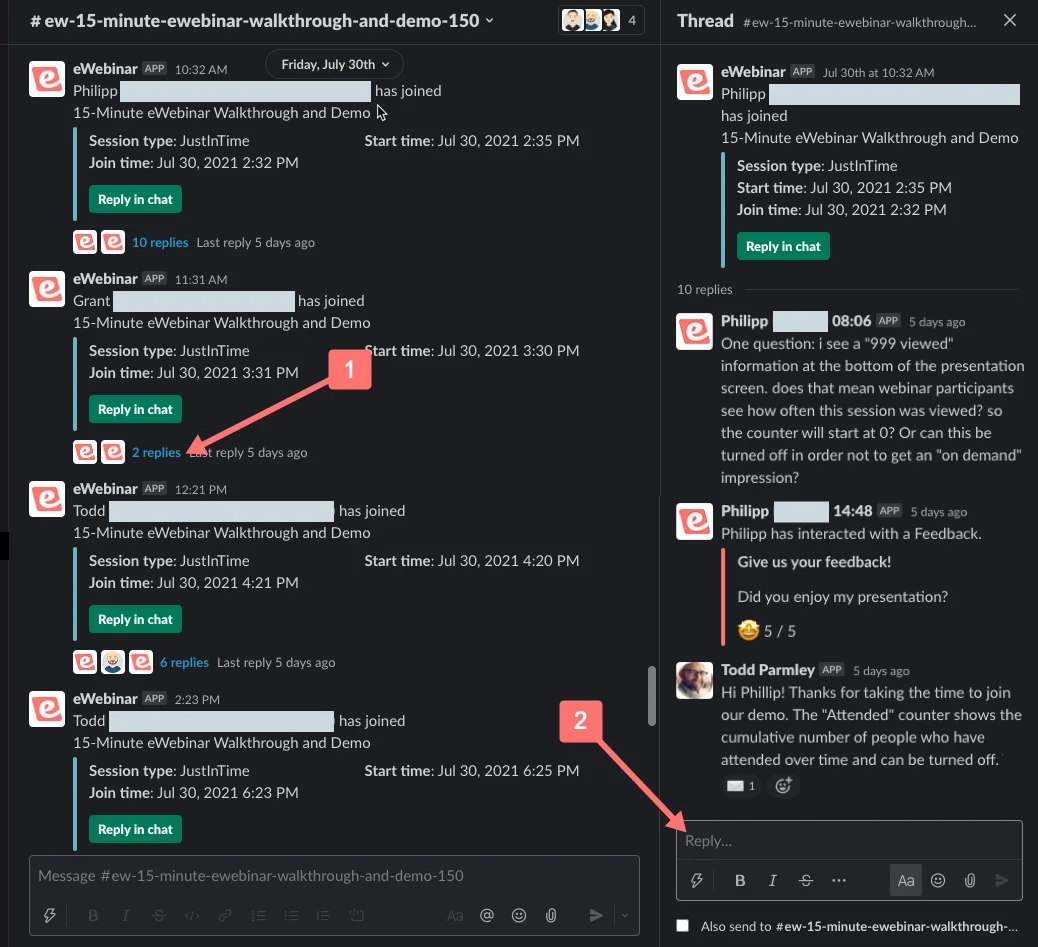
If you click that notification, you will be taken to the new message, which will tell you:

- Who the attendee is
- Which webinar they joined
- Their Session type
- The Start time of their session
- And the time they joined (Join time)
The system will also automatically create a thread associated with the message. To message to an attendee from Slack:
- Click on the thread that was created
- Send a message from within the thread
Please note you will only get one Slack notification per attendee as Slack does not send notifications for each of the messages posted to a thread unless you either:
- Send a message to the attendee in their thread, which will cause you to join the thread and get notified of new replies
- Ask to get notified about new replies in that thread
To do the latter:
- Click the More actions icon next to the primary Slack message
- Click Get notified about new replies

A few other things worth noting:
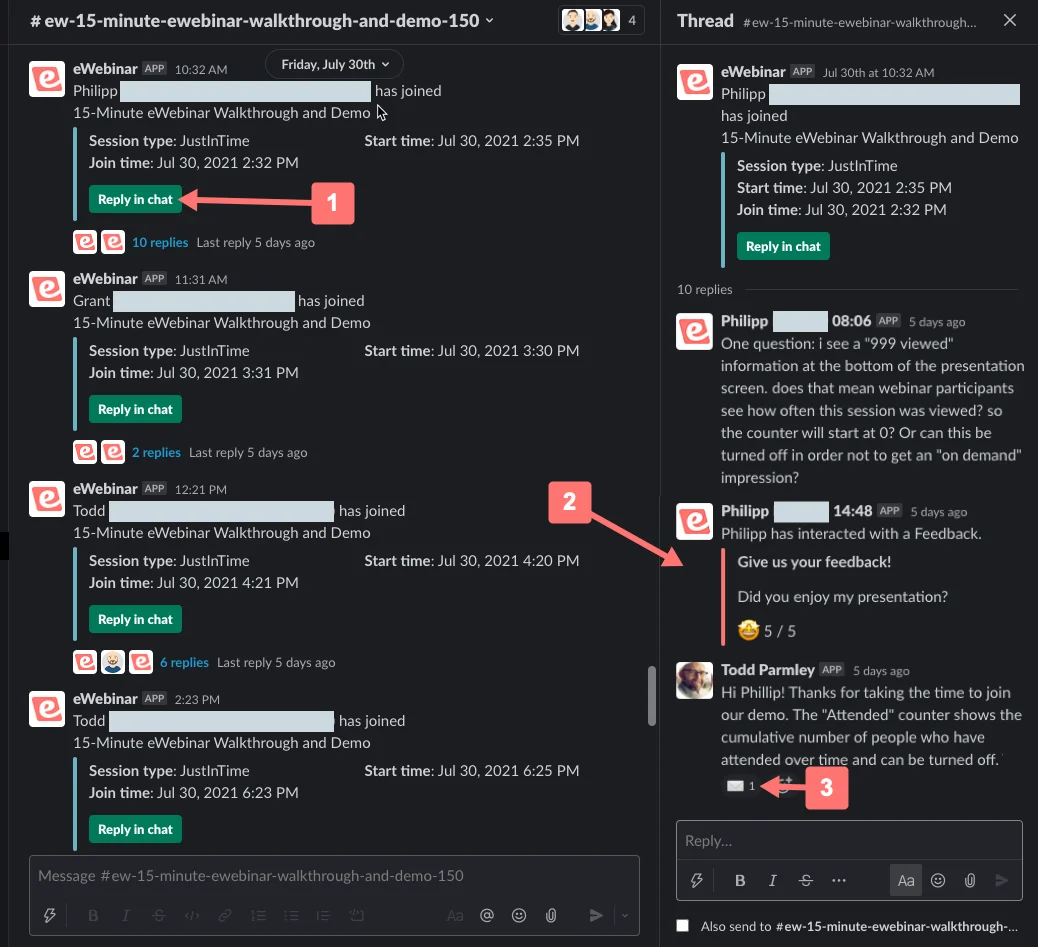
- If you click Reply in chat, you'll be taken to the chat interface in eWebinar
- You can see how attendees responded to your interactions in their thread
- If you reply to an attendee after they have gone offline, you will see an email icon to indicate your message was sent by email
Who can set this integration up?
Anyone on your team who has Slack credentials and Admin status within eWebinar will be able to set this integration up.
How to set up the Slack integration
To set up your integration with Slack, you will need to follow these steps:
- Login to eWebinar.
- Expand your profile menu using the dropdown button at the top right corner of this page.
- Select Integrations.
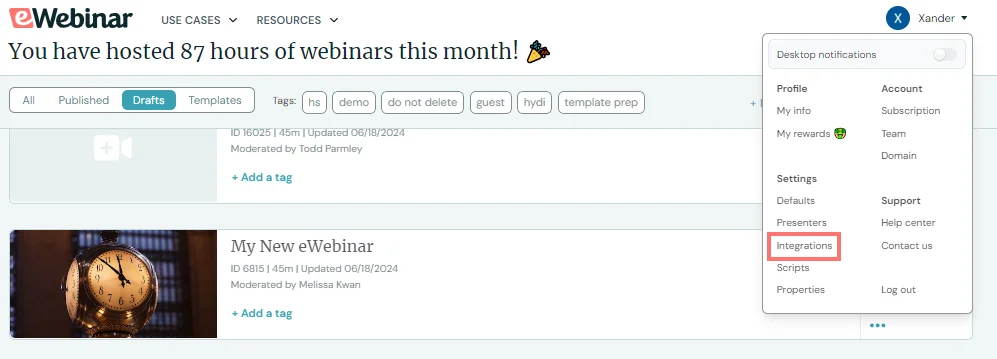
- Scroll down to Available integrations.
- Click on Slack.
- You will be prompted to sign in to Slack.
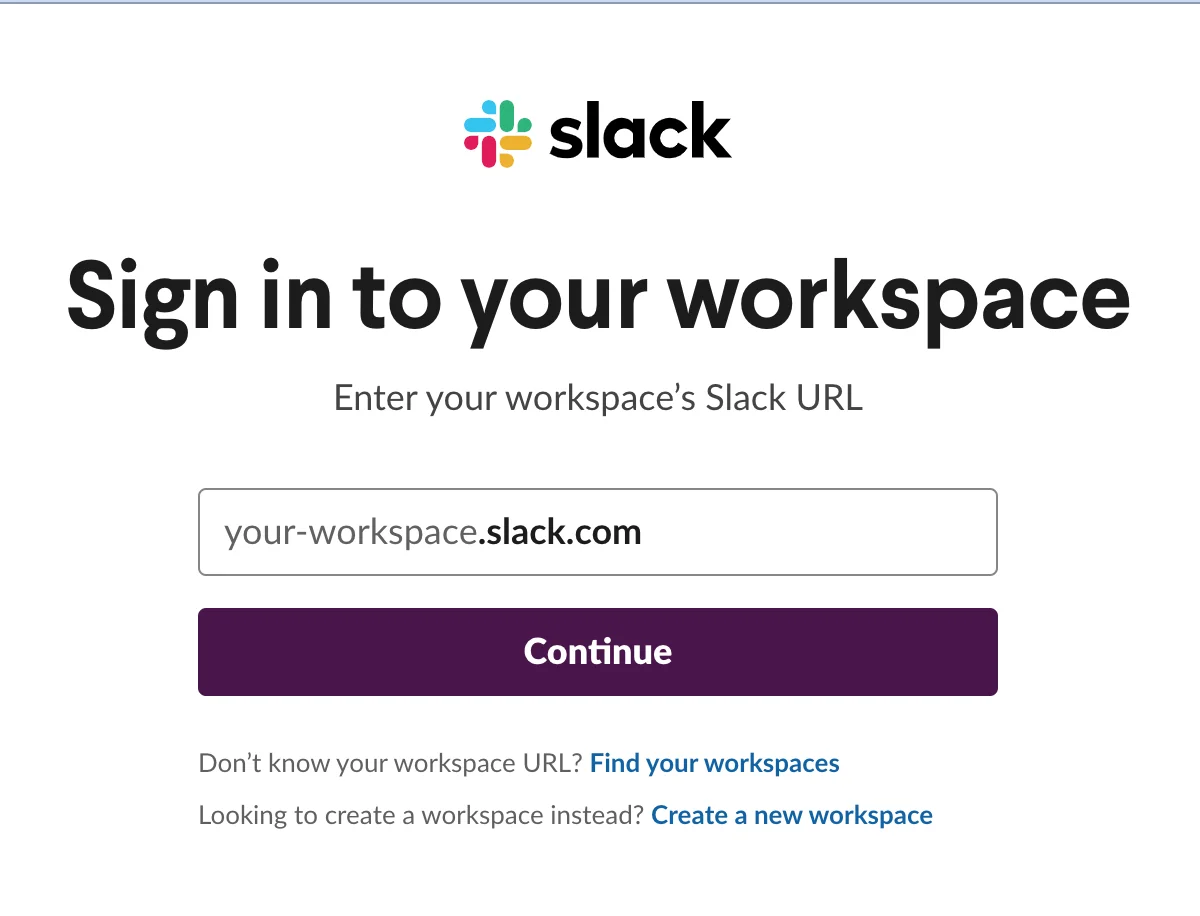
- Once signed in, click Allow to permit eWebinar to function within Slack.
- Choose your desired settings for this integration (detailed below).
- Once you have done this, click Update & Connect.
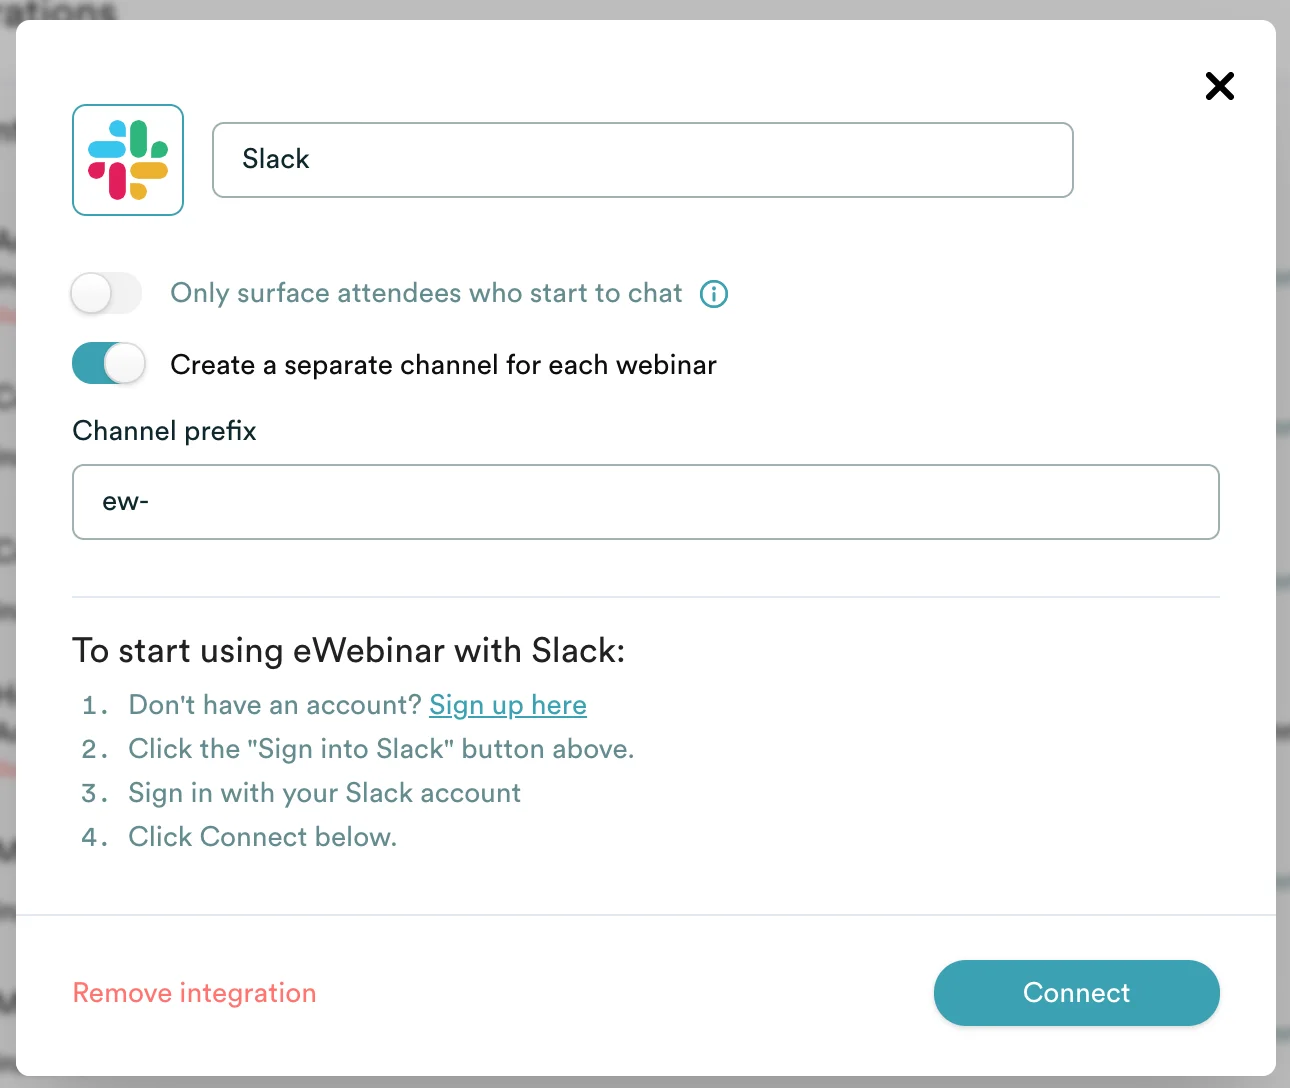
Choosing the appropriate settings for eWebinar and Slack
As part of the setup process outlined above, you will have two settings you can adjust to suit your needs and preferences. They are outlined below.
Only surface attendees who start to chat
This is a feature you can toggle on or off.
If this feature is enabled, you will be notified when someone sends a chat message from one of your eWebinars. The notification you receive will say only that an attendee has joined your webinar, however, so you will need to click through to see the message they've sent.
If this feature is disabled, you will be notified when someone joins a session (but not when they send you a message). This is useful if you want to be able to proactively start conversations with attendees by sending them a message after they join.
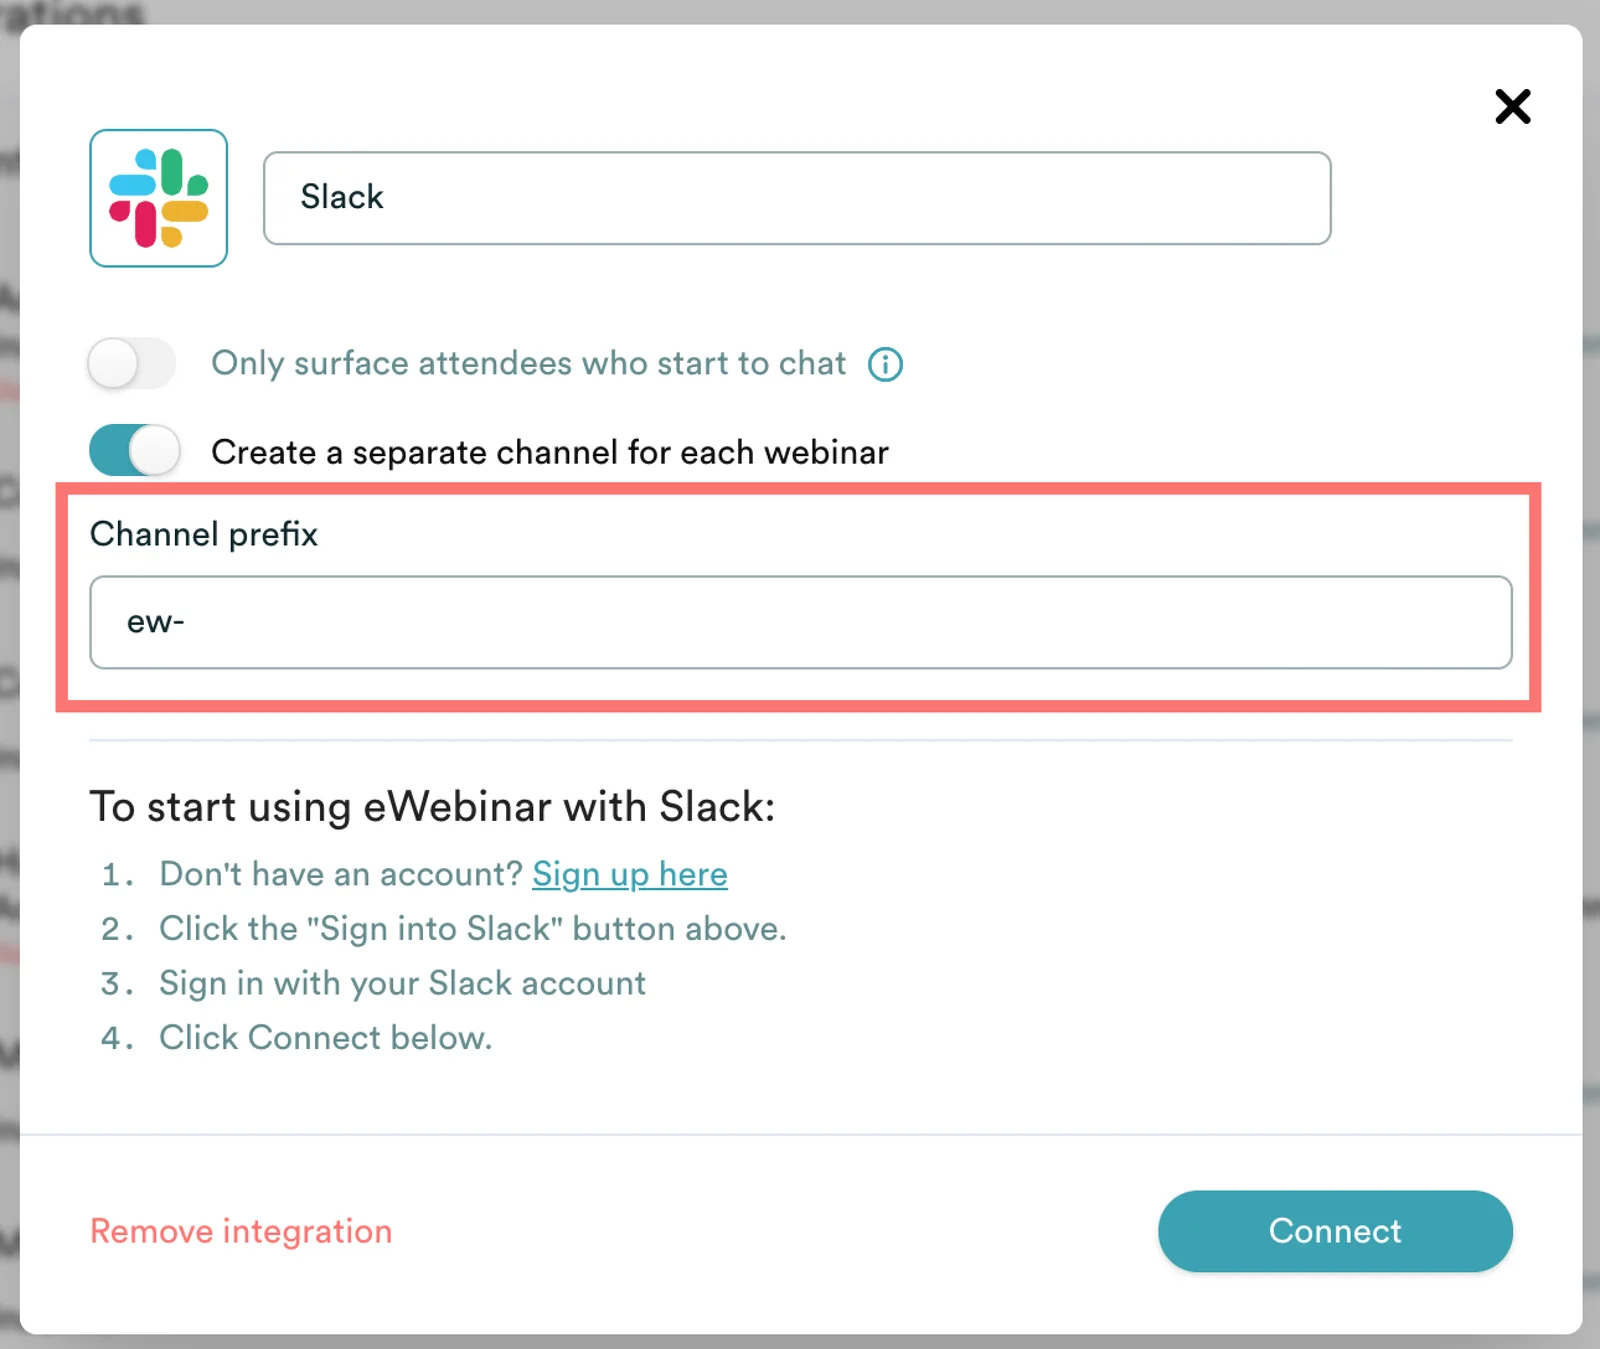
Create a separate channel for each webinar
This is also a feature you can toggle on or off.
If this feature is enabled, a new channel will be created within Slack automatically for each of your webinars.
You will be prompted to choose a prefix that will appear at the beginning of each channel name, so you'll always know which channels are associated with eWebinar. We recommend that you include a hyphen after this prefix.
If this feature is disabled, you will be asked to choose an existing channel from among those you've already created in Slack, which means you may need to create the channel first before you can add it.
There are a three important things to note about this feature:
- Separate channels will not appear immediately. They will be created in Slack when you receive your first notification in the channel. Note: Your eWebinar email and Slack email must be the same, and you must have permission in Slack to create new channels.
- Only Moderators will be automatically added to these channels but anyone on your team can search for and join them.
- Messages sent after a session will be sent to the attendee's email.
Specify a Slack channel per webinar
When the "Specify a channel per webinar" option is enabled in your Slack integration settings, you can choose a specific Slack channel for each individual webinar rather than having eWebinar create channels automatically or routing all notifications to a single shared channel.
The channel for each webinar is set inside that webinar's own settings — not in the global Slack integration. To configure it:
- Edit the webinar you want to configure.
- Click on the Chat tab.
- Under the Notifications section you'll see a section to get Notifications via Slack. There select the channel you want notifications for that webinar to be sent to.
The eWebinar bot must be invited into the Slack channel before the channel appears in the dropdown.
If you don't see a channel listed, go to that channel in Slack and invite the eWebinar app first:
- Open the channel in Slack.
- Click the channel name at the top to open its settings.
- Go to Integrations > Add apps and select eWebinar.
Once the bot has been invited, return to the webinar's Chat settings in eWebinar. If you were already on that page when you invited the bot, refresh the page to see the newly available channel appear in the dropdown.
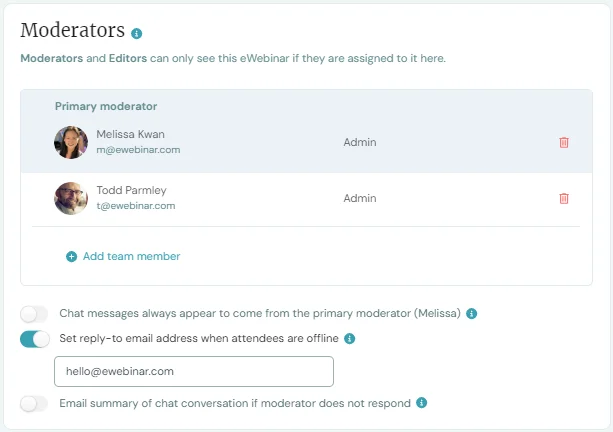
Who can respond to attendee messages in Slack?
When a channel is created, team members set as Moderators for your webinar will be automatically added. If you would like other team members to be involved, they can search for and join the channel in Slack.
This means that anyone in this channel can see notifications and respond to messages, but your settings within eWebinar will dictate who they appear to be sent by.
To adjust these settings, edit the appropriate webinar and click on the Chat tab. There, you will be able to choose whether you want replies to appear to be sent by the primary moderator, or the moderator that actually sends the message.
Note: This setting will apply across the board, not just to messages sent within Slack.
If a team member that isn't a Moderator within eWebinar responds to a message from Slack, the message will appear to have come from the webinar's primary moderator no matter which setting you choose.
What happens if I change options mid-way through?
If for example you decide to create separate channels per webinar or to not create them after you're already using the Slack integration that's perfectly fine. However, any conversations that are currently ongoing will remain in their thread and in their current channel. Only threads from new attendees will be created in the channels following the new settings.
How to troubleshoot the Slack Integration
If you're experiencing issues with your integration between eWebinar and Slack, specifically if you're not receiving eWebinar notifications in your Slack channel, here are some steps you can take to troubleshoot the problem:
- Check for Errors: Start by navigating to your profile menu in eWebinar, expand it, and then select Integrations from the dropdown menu. Scroll down to find the Slack icon and click on it to open a pop-up modal that displays an overview of Slack activity and errors, to get an overview of the errors filter by Only errors.

- Error "not_in_channel": If you see the error message "not_in_channel", it means that the eWebinar App is not in the channel it's trying to post to. To fix this, go to the channel in Slack and click on the channel name at the top of the window, then in the pop-up modal, click on Integrations and select Add apps. From there, choose eWebinar to add it to the channel.

If the issue persists, don't hesitate to reach out to us at support@ewebinar.com. Our team will do our best to assist you in resolving the issue.
Related articles: