eWebinar has a video file size limit of 2GB for each webinar due to bandwidth and streaming costs, such that we can keep monthly subscriptions at the current level.
When you integrate with Vimeo, you can choose to keep your videos hosted in your Vimeo account instead of in eWebinar, so that you can create eWebinars from videos larger than 2GB.
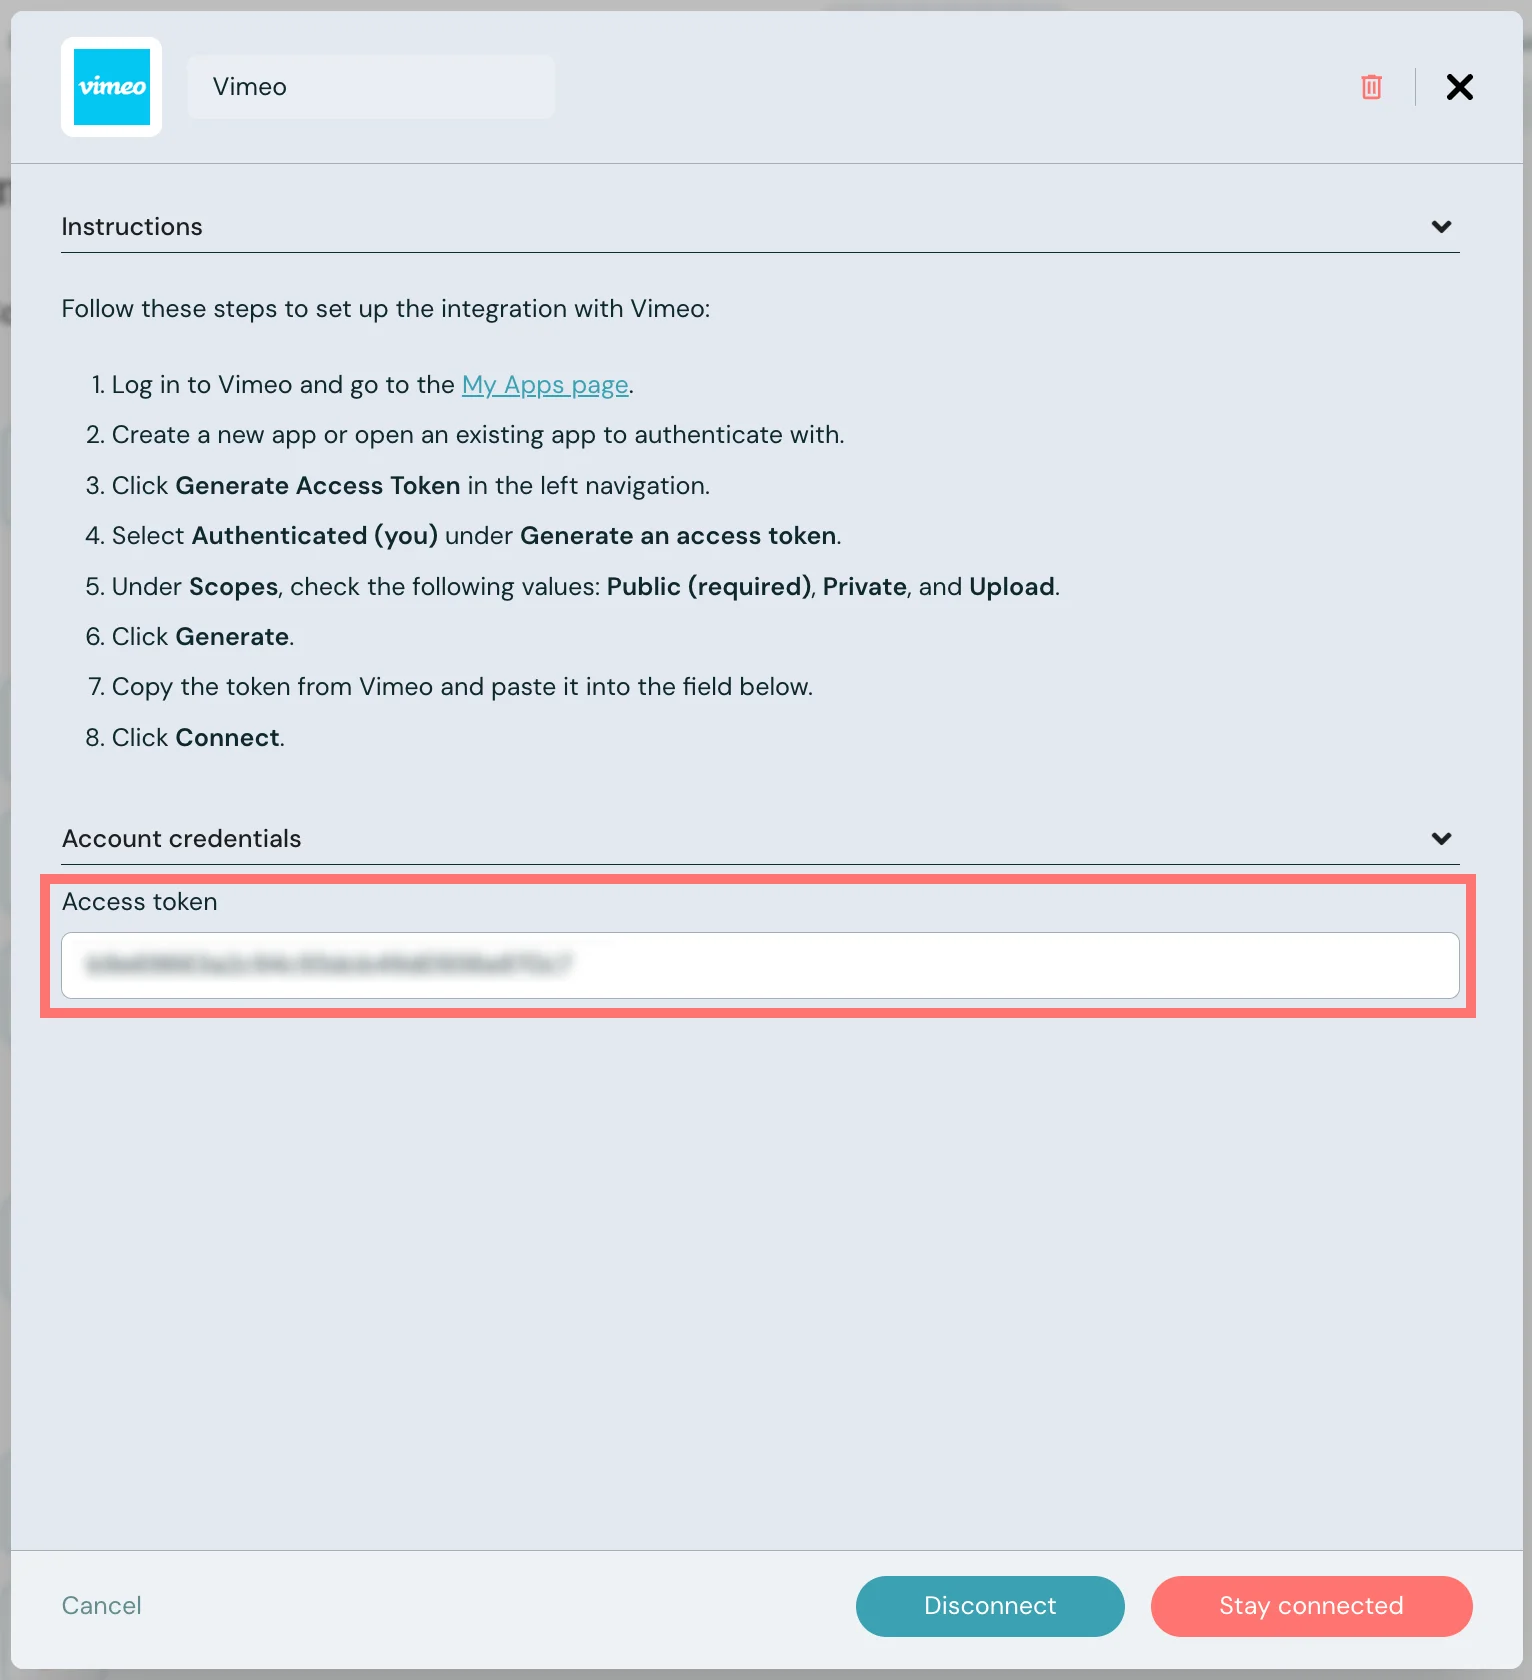
To set up the integration:
- Log in to Vimeo and go to the My Apps page.
- Create a new app or open an existing app to authenticate with.
- Click Generate Access Token in the left navigation.
- Select Authenticated (you) under Generate an access token.
- Under Scopes, check the following values: Public (required), Private, Upload, and Video Files.
- Click Generate.
- Copy the token from Vimeo, go to eWebinar and log in.
- Go to the Integrations page and click Vimeo.
- Paste the Access token into the field provided under Account credentials (shown below).
- Click Connect.
To use the integration with Vimeo:
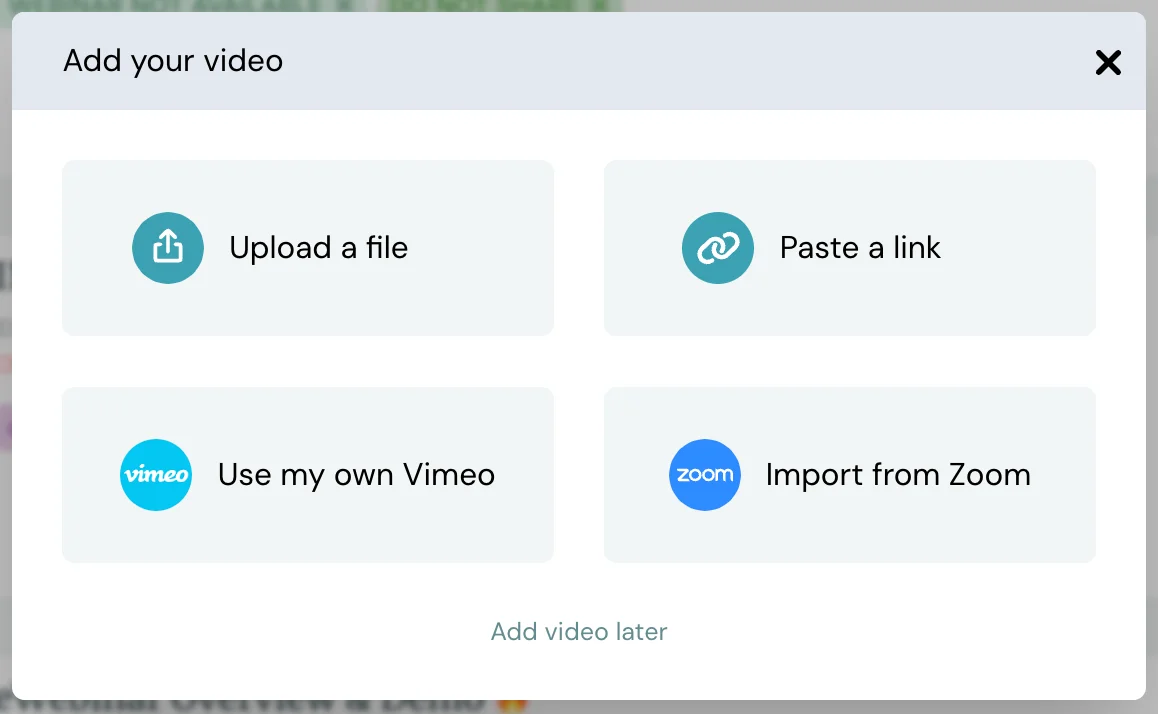
- When you create a new eWebinar and are prompted to upload a video (or when you go to replace the video of an existing webinar from the Interactions tab), choose Use my own Vimeo in the Add video modal window.
- Select the video from your Vimeo account that you would like to add to your webinar and click Continue.