How do I replace a video and add closed captions in my eWebinar?

Find out where to go to replace your eWebinar's video and add closed captions, plus the things you should consider before doing so.

Both replacing your video and uploading closed captions can be done in the interactions tab of your eWebinar. Click below to learn how to do both:

How do I replace a video in my eWebinar?
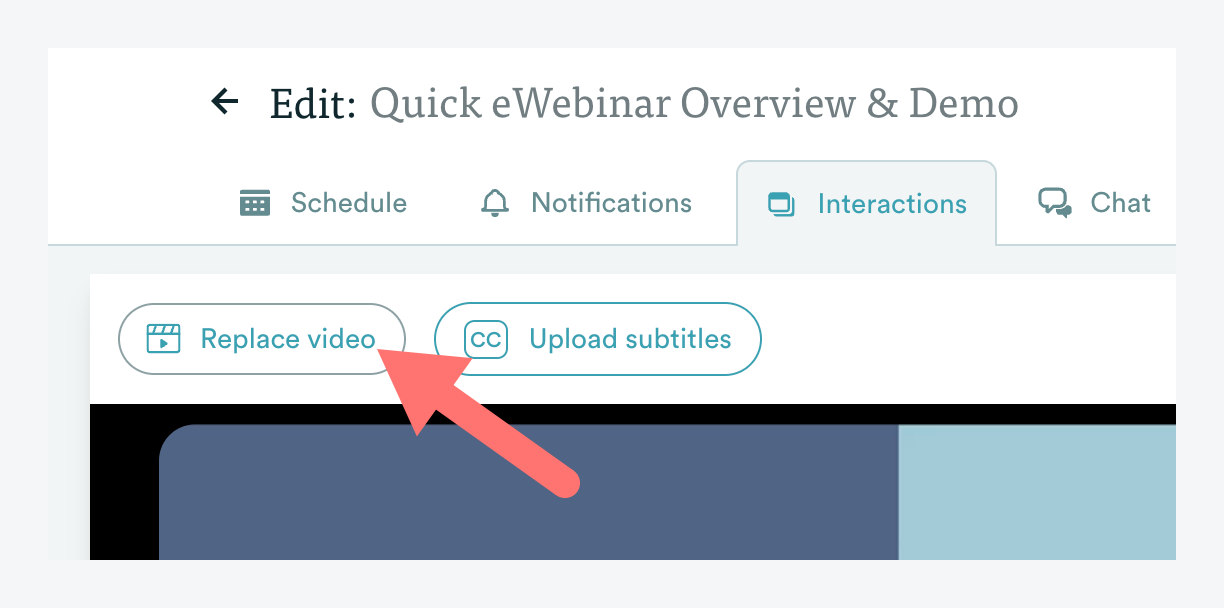
To replace the video in your eWebinar, edit it, go to the Interactions tab and click the Replace video button in the top left corner of the page.

Before replacing your video, however, consider which of the following two options is best for you:
 
1. Replace video and adjust Interactions on timeline
If your new video is very similar to the original video, this is usually the best option.
Once you have replaced the video, you will need to adjust the position of the Interactions on the timeline so they match the new video. This will cause them to become out of sync with previous attendee behavior in Analytics. If you remember the date you replaced the video, you can always filter your Analytics by the relevant dates to see the "before" and "after".
The main advantage to this option is that the URL to your eWebinar registration page remains the same and you do not need to replace registration widgets you have used, if any, on third-party landing pages.

2. Duplicate webinar and replace video in copy

If your new video is very different from the original video, this is typically the better option.
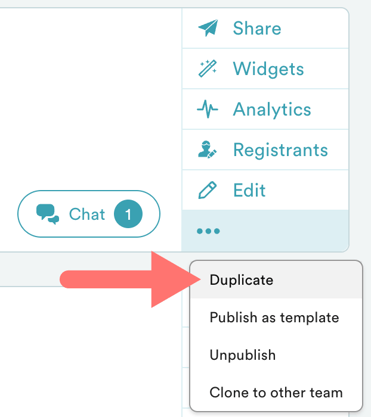
To duplicate a webinar, go to the home page and click the ellipsis (...) on the webinar in question and then Duplicate. The duplicate will be a Draft.
Replace the video in the duplicate by clicking Replace video on the Interactions tab, adjust the position of the Interactions on the video's timeline accordingly, and publish the new webinar. You may then unpublish the original webinar, if you like.
The advantage to this option is you get a clean picture of the Analytics of the new webinar without having to filter them by date. Just remember, you will need to replace the URL and registration widgets you use to promote your webinar in landing pages, emails, ads, blog posts, etc.

How do I add closed captions to the video in my eWebinar?

To add closed captions (AKA subtitles) to your video in eWebinar, you must first generate a closed captions file in one of the supported file formats, which are VTT (Recommended), SRT, TTML, SCC and SAMI.

NOTE: There are a number of different free tools you can use to generate a VTT file from a video, including YouTube.

Here's a short video showing how to generate a VTT file using YouTube:

Once you have created the file, login to eWebinar and:

1. Edit the eWebinar in question and go to the Interactions tab.

2. Click Upload subtitles.
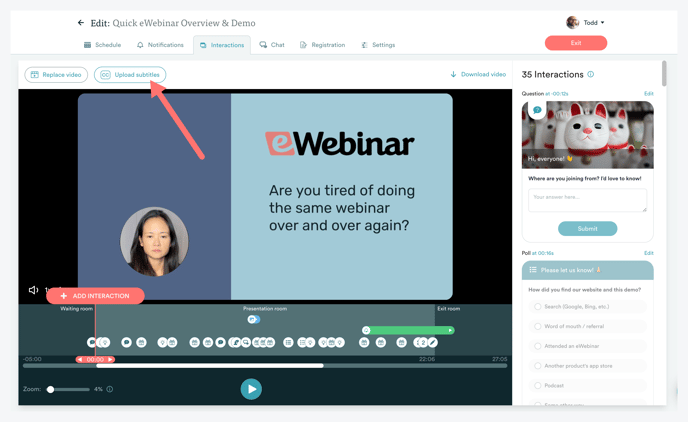
3. Upload the file.

4. Save and publish the change.

NOTE: You may only upload one closed captions file per eWebinar. Generally, the subtitles should be in the same Language as is specified in the Settings tab (unless you want them to appear in a different language). If you subsequently change the Language of your webinar, you must upload a new file if you wish to have closed captions for the new Language.