Zapier lets you connect APP to 3,000+ other web services. Automated connections called Zaps, set up in minutes with no coding, can automate your day-to-day tasks and build workflows between apps that otherwise wouldn't be possible.
Each Zap has one app as the Trigger, where your information comes from and which causes one or more Actions in other apps, where your data gets sent automatically.
Getting Started with Zapier
Sign up for a free Zapier account, from there you can jump right in. To help you hit the ground running, here are some popular pre-made Zaps.
How do I connect eWebinar to Zapier from Zapier?
- Log in to your Zapier or create a new account.
- Navigate to My Apps from the top menu bar.
- Search for eWebinar and click Add connection.
- Use your credentials to connect your eWebinar account to Zapier. (See the instructions below to see where you can find the API Key.)
- Once that's done you can start creating an automation! Use a pre-made Zap or create your own with the Zap Editor. Creating a Zap requires no coding knowledge and you'll be walked step-by-step through the setup.
Need inspiration? See everything that's possible with eWebinar and Zapier
If you have any additional questions, you can reach out to contact@zapier.com.
The process of setting up an integration between eWebinar and some other product by way of Zapier is called "making a Zap". To learn more about what Zapier is and how it can be used to integrate eWebinar with thousands of web apps, click here.
How do I connect eWebinar to Zapier from eWebinar?
To make a Zap that will integrate eWebinar with any number of products, walk through the following steps:
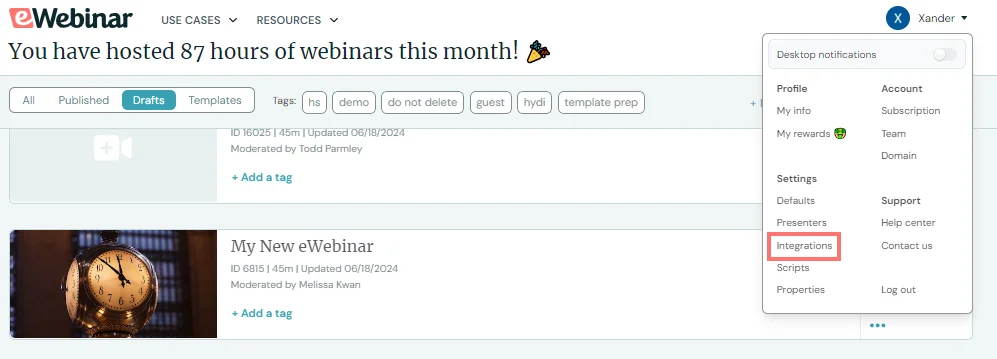
1. Login to eWebinar and open the profile menu to get to the Integrations page.
2. Click on Zapier under Available Integrations.
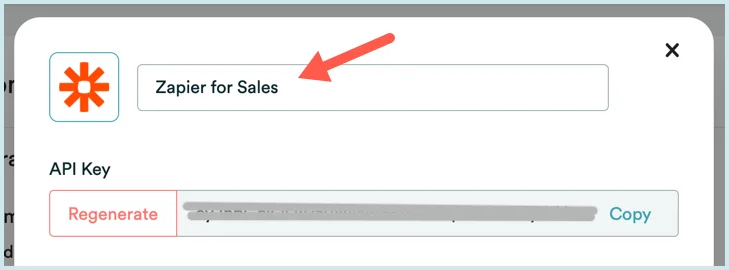
3. Copy the API Key in the modal window that opens. You will paste this into Zapier in step 10.
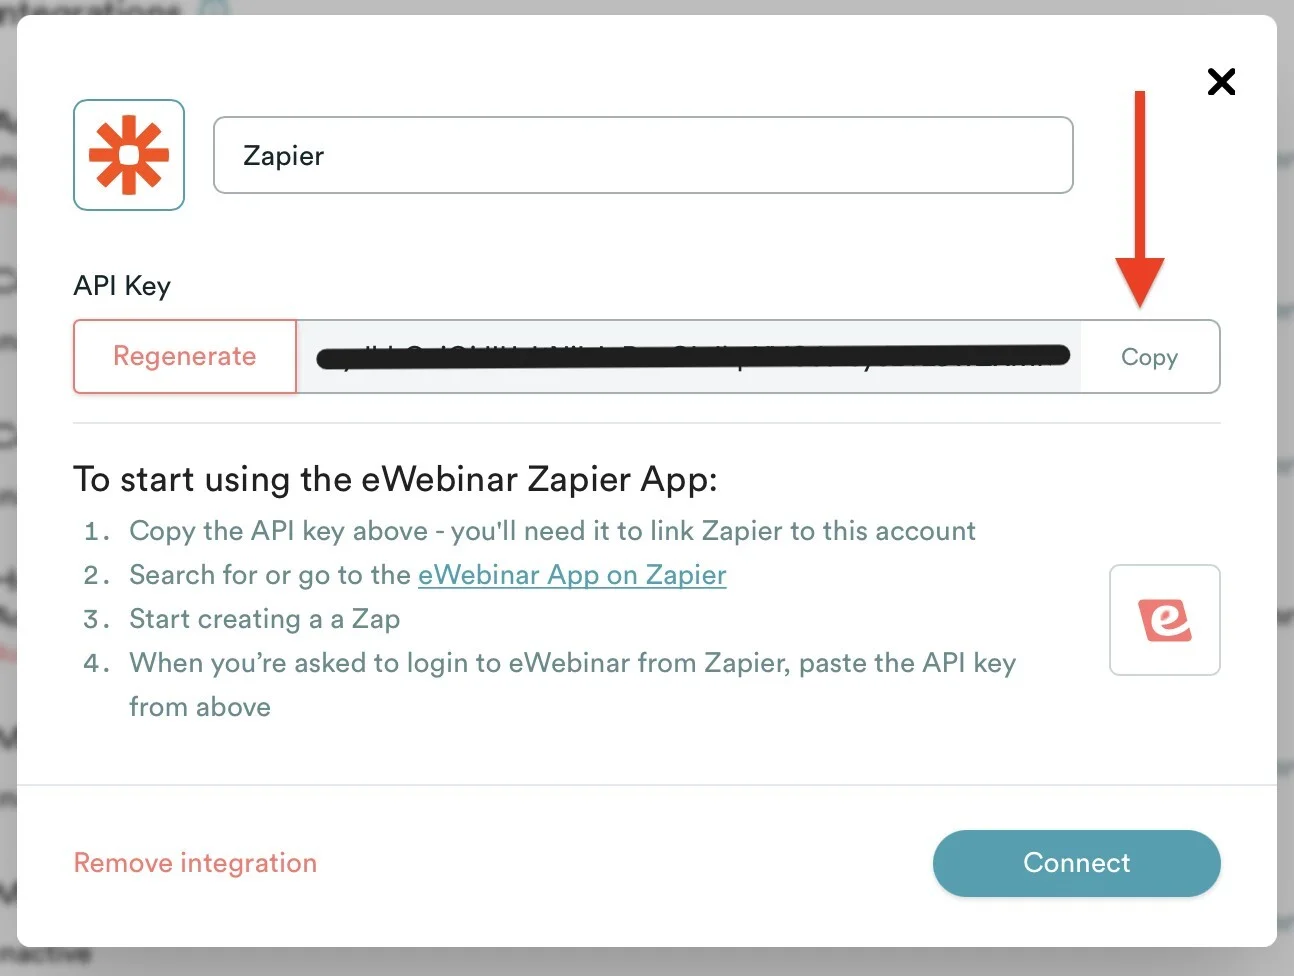
4. Then, click the link to the eWebinar App on Zapier link.
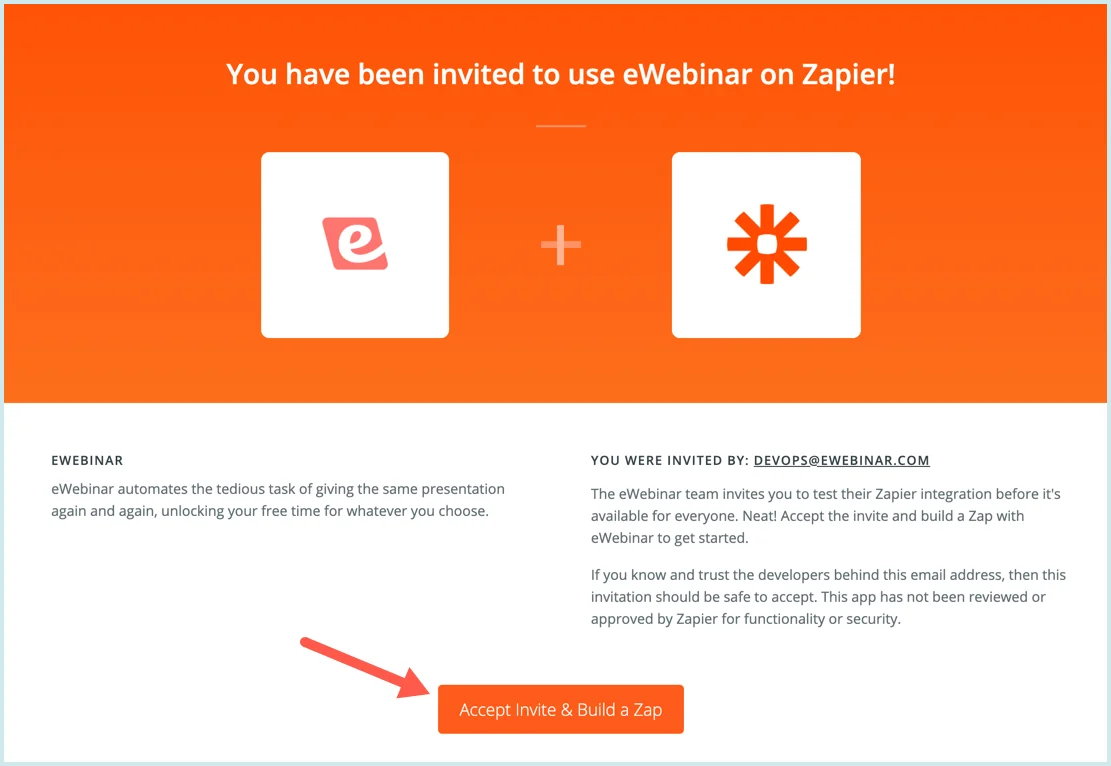
5. You will be taken to Zapier in a separate tab or window, where you will be prompted to login.
NOTE: If you do not have a Zapier account, you will need to create one first before you can continue. After you create your account, you may need to go back to eWebinar and click the invite link again.
Once you are logged in to Zapier, you will be able to accept the invite.
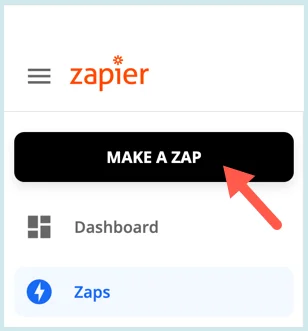
6. Once you accept the invite, you will be taken to the Zapier Dashboard, where you can click MAKE A ZAP.
In the process of making the Zap, you will be asked to define an IF THIS THEN THAT (IFTTT) statement that will govern how eWebinar integrates with whatever product you choose to integrate it with via Zapier.
Part 1 of the process asks you to define the IF THIS ("When this happens...") part of the statement that happens on the eWebinar side of things and Part 2 asks you to define the THEN THAT ("Do this...") part of the statement, which is what happens in the second product.
NOTE: At any point during the process, you can name your Zap. We recommend giving your Zap a name that describes the integration you are setting up, like "eWebinar to Hubspot".

PART 1: When this happens...
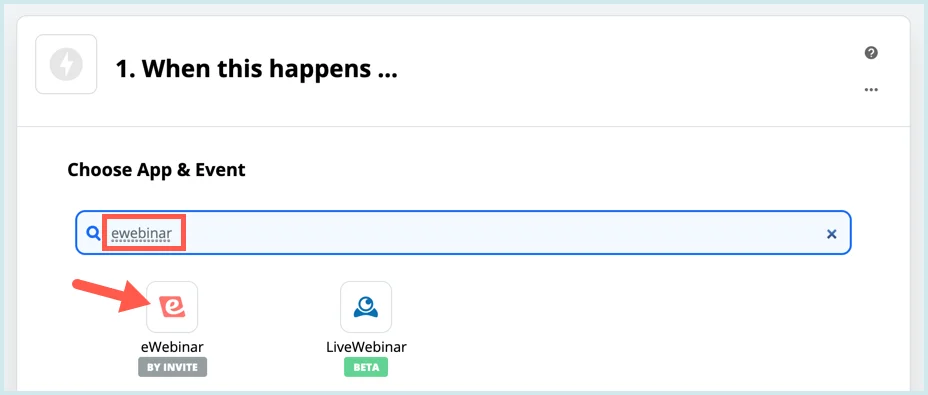
7. Search for and select eWebinar as the App.
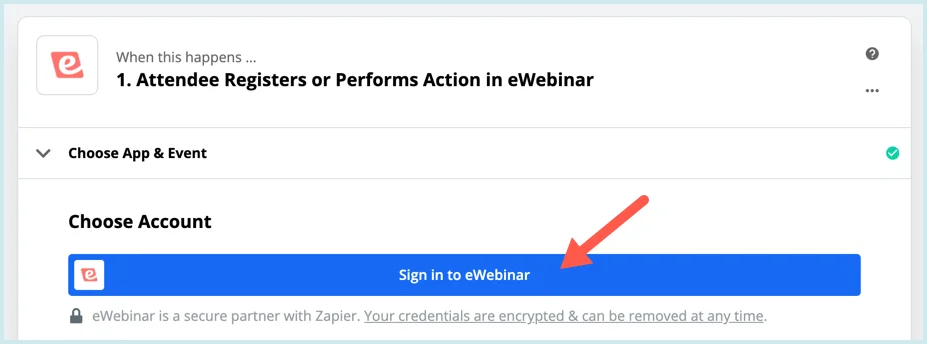
8. Once you select eWebinar as the App, the Trigger Event will pre-populate automatically as Attendee Registers or Performs Actions. Later on in the process, you will be able to specify which attendee action(s) trigger the Zap. Click CONTINUE.

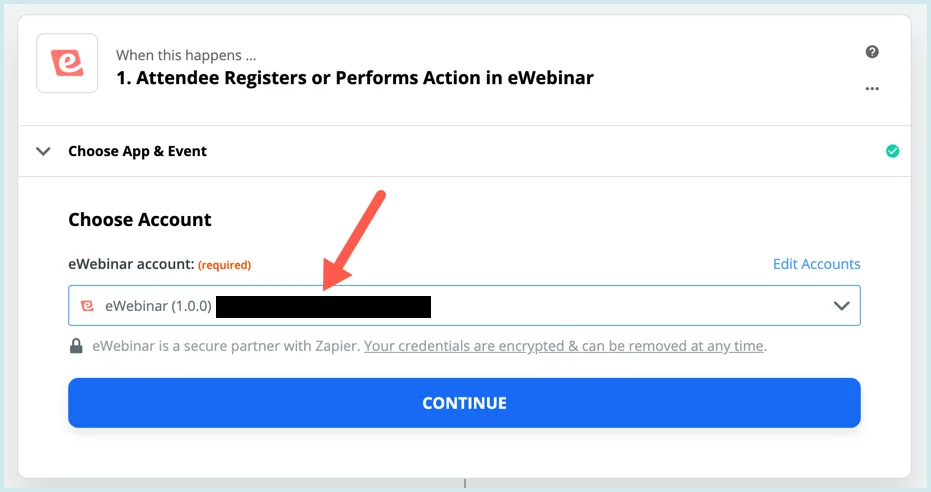
9. Click Sign in to eWebinar, which will open a new window.
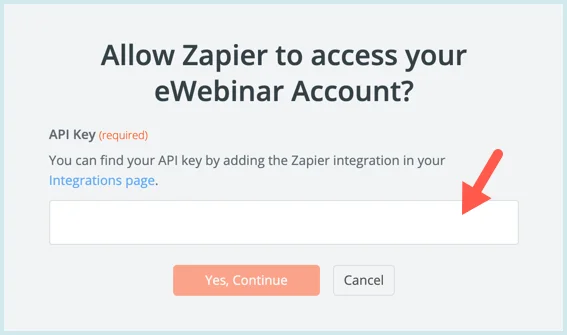
10. Paste in the API Key you copied in step 3 and click Yes, Continue.
11. The window will close and your eWebinar account will pre-populate, showing the company name associated with your account.
12. Under Customize Registrant, you can specify which action(s) on the eWebinar side will trigger the Zap. Open the Action drop-down menu and then click the Action tab to see the available actions to choose from. All is selected by default, which means the Zap will be triggered if any of the actions on the list occur.
Most people set up 2 separate Zaps, one for Registered and one for WebinarFinished - note you won't get advanced metrics like Watched % until the WebinarFinished action since at registration time we don't yet know them.

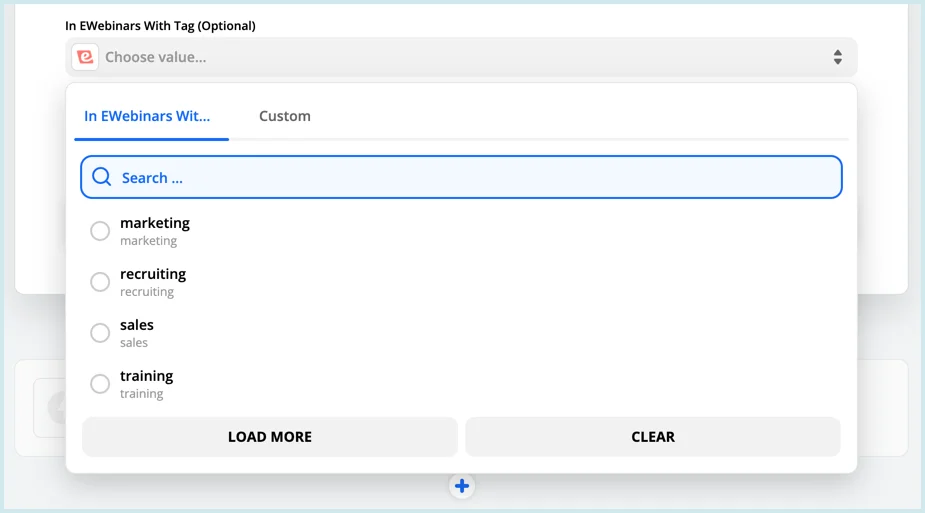
13. If you would like this zap to apply to all of your eWebinars, skip this step by clicking CONTINUE.
If, however, you want it to apply only to certain eWebinars, select a tag from the list of available tags and click CONTINUE. When and only when you add the same tag to any of the eWebinars you create will this Zap be used in conjunction with it.
NOTE: The four tags to choose from by default are marketing, recruiting, sales, and training, but you can create your own custom tags within eWebinar. Click here to learn more about tags and how to add them to your eWebinars.
TIP: You can create multiple Zapier integrations and tag them to be used with different tagged eWebinars. If you decide to do this, it is a good idea to name your Zapier integrations differently so as to tell them apart.
14. Click Test trigger to test the integration with the eWebinar side of things.
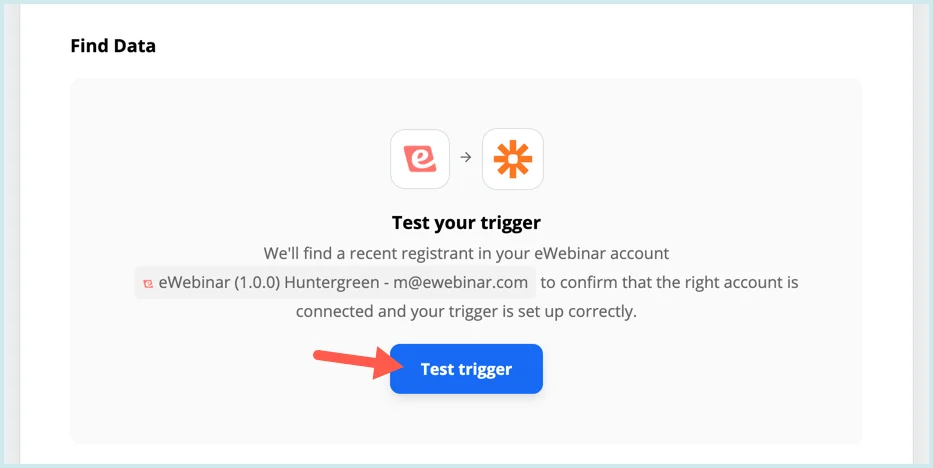
When you do, you should see test data successfully pulled in to show the integration is working as expected. A recent registrant from your eWebinar account will be used in the test. If none exists, a test registrant will be created for you.
PART 2: Do this...
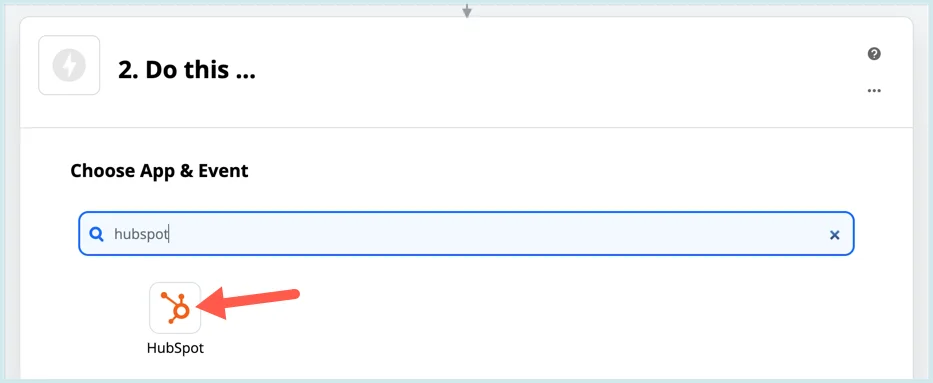
15. Search for and choose the app you wish to integrate with eWebinar. We have used Hubspot in the example below.
16. Walk through the remaining steps associated with Part 2 of making your Zap.
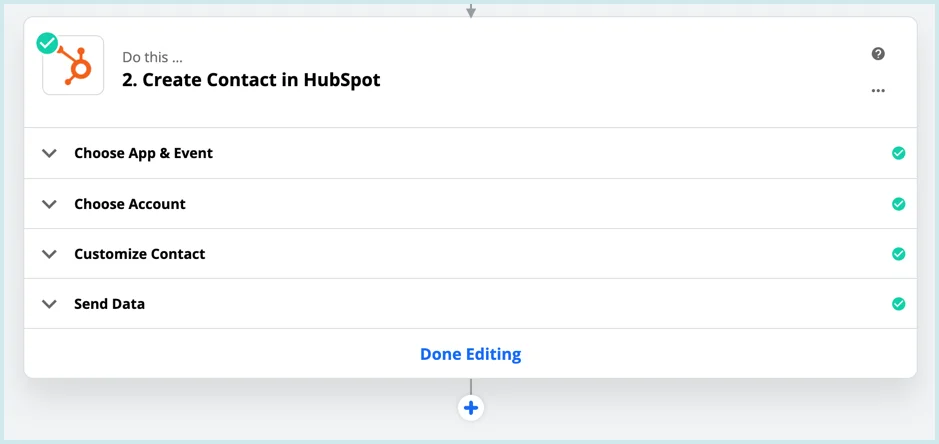
These steps which will vary somewhat from product to product. The completed steps shown below continue to use Hubspot as an example only.
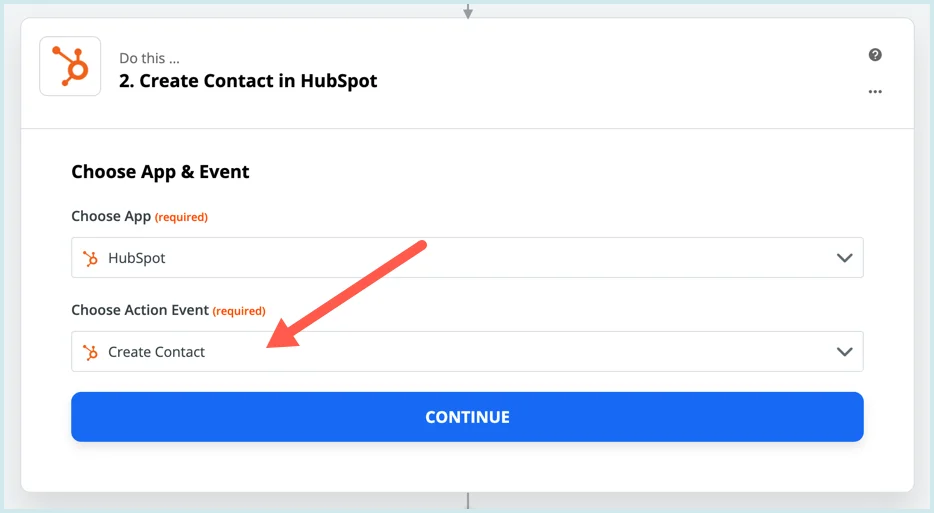
- Choose App & Event: After you choose the app, you will be asked to select what will happen in that app when the Zap is triggered in eWebinar.
- Choose Account: You will be asked to sign in to the product with which you want to integrate and grant access to Zapier to send and receive data to/from it.

- Customize: In this step, you will be asked to customize what data you would like to be sent from eWebinar to the second product and to map it to the relevant fields within that product.
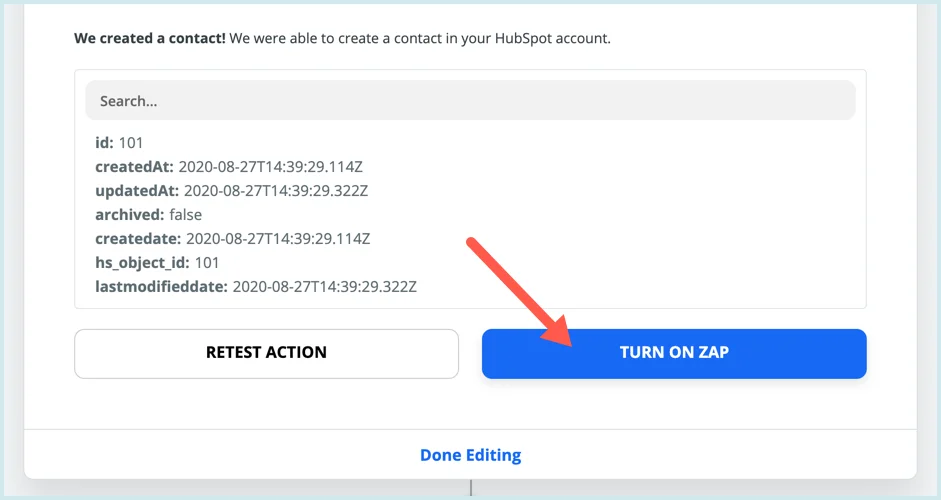
- Send Data: This is where you will be able to test the full integration, in which the event you have specified in Part 2 ("Do this...") will be carried out and actual data will be sent from eWebinar to the second product.
17. When you are satisfied with how things have been set up, you can turn on the Zap.
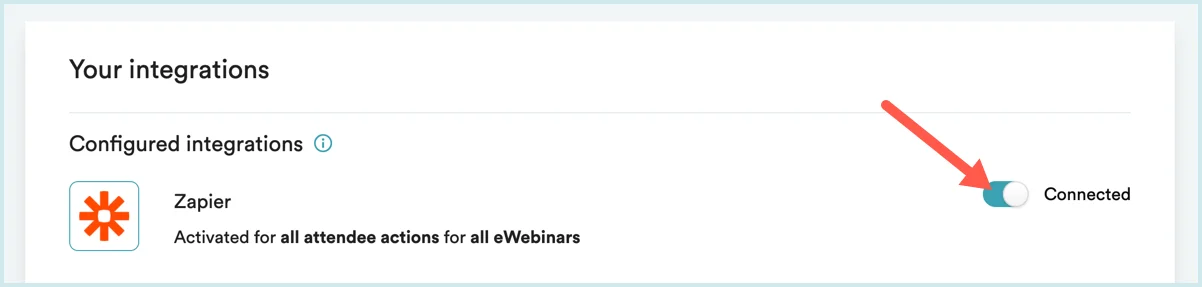
Once the integration with Zapier has been set up, you can turn it on or off on the Integrations page of your eWebinar account.