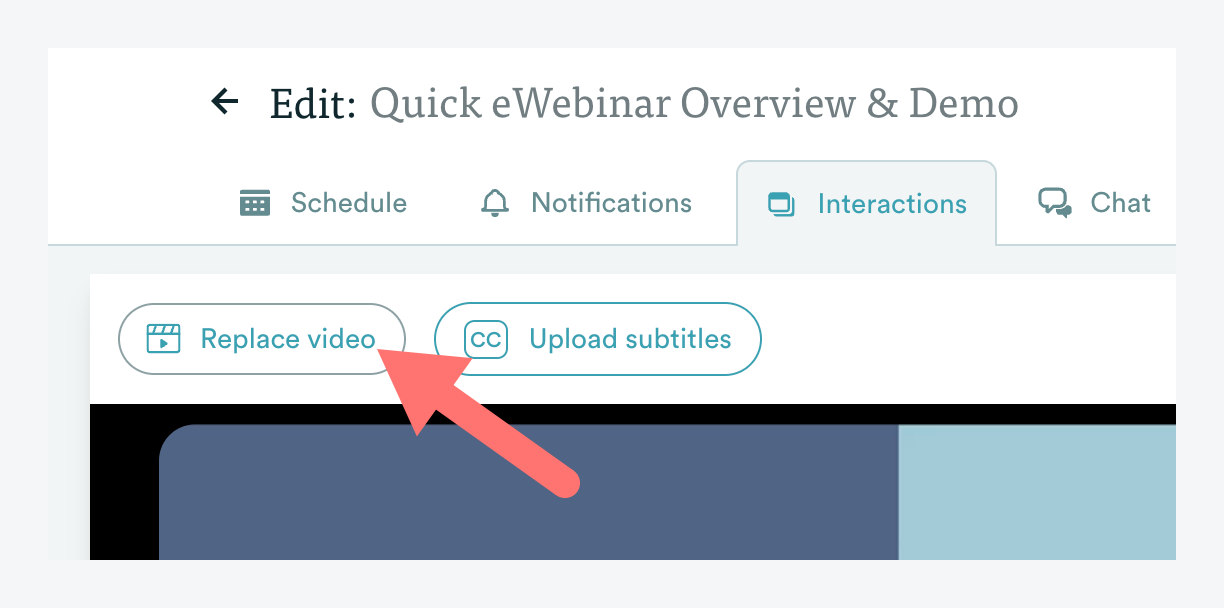
Both replacing your video and uploading closed captions can be done in the interactions tab of your eWebinar. Click below to learn how to do both:
How do I replace a video in my eWebinar?
How do I add closed captions to the video in my eWebinar?
To add closed captions (AKA subtitles) to your video in eWebinar, you must first generate a closed captions file in one of the supported file formats, which are VTT (Recommended), SRT, TTML, SCC and SAMI.
NOTE: There are a number of different free tools you can use to generate a VTT file from a video, including YouTube.
Here's a short video showing how to generate a VTT file using YouTube:
Once you have created the file, login to eWebinar and:
1. Edit the eWebinar in question and go to the Interactions tab.
2. Click Upload subtitles.
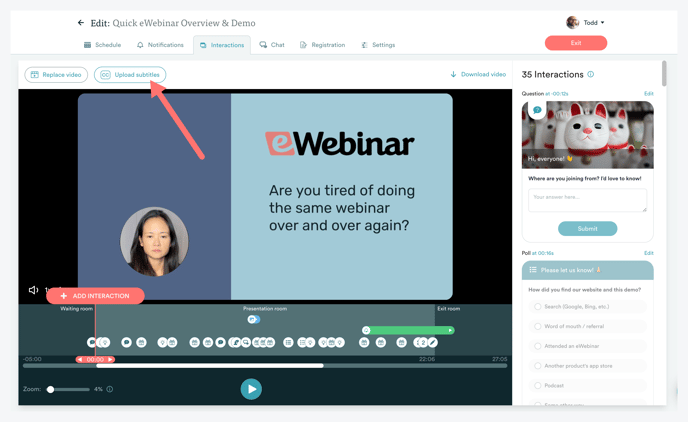
3. Upload the file.
4. Save and publish the change.
NOTE: You may only upload one closed captions file per eWebinar. Generally, the subtitles should be in the same Language as is specified in the Settings tab (unless you want them to appear in a different language). If you subsequently change the Language of your webinar, you must upload a new file if you wish to have closed captions for the new Language.