Thinkific is a software platform that enables entrepreneurs to create, market, sell, and deliver their own online courses. To learn more, visit thinkific.com.
When you integrate eWebinar with Thinkific, you can use the Thinkific interaction card during an eWebinar to drive your online course sales by sending attendees directly to your checkout page. Learn more about why you should use eWebinar to sell your Thinkific courses.
Here's what we'll cover in this post:
Integration highlights
There are four different parts to eWebinar's integration with Thinkific that each has its own benefits. They are:
- Thinkific interaction card
- Auto-population and sync
- Thinkific eWebinar template
- Embedded eWebinar in Thinkific course
- Thinkific interaction card: Use this special interaction card to direct attendees to the checkout page of your course at exactly the right moment in the sales pitch of your eWebinar.
- Auto-population and sync: Your Thinkific course description and pricing will automatically populate to your Thinkific interaction card when you create it and stay synced so you don’t have to worry about updating in two places.
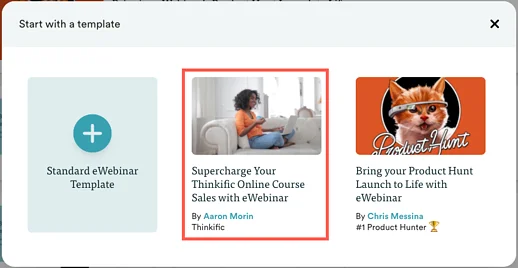
- Thinkific eWebinar template: Use this template, created by Aaron Morin of Thinkific, to quickly create an effective webinar to sell your course, one which incorporates best practices and comes with a number of pre-set interactions
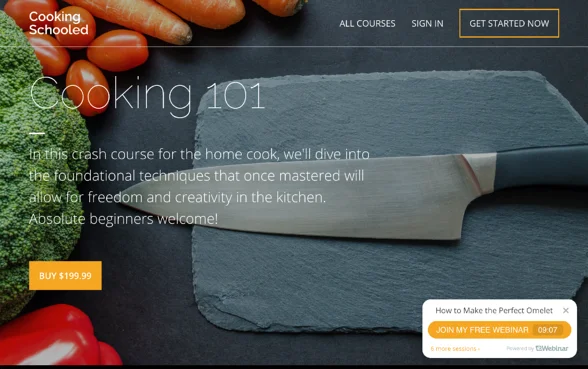
- eWebinar widget: You can install an eWebinar countdown widget on your Thinkific landing page and drive attendees to your webinar
- Embedded eWebinar in Thinkific Course: Embedding the eWebinar experience into your Thinkific course allows you to use on-demand webinars to deliver an interactive and engaging lesson that’s different than a traditional video. All the polls, questions, tips, downloads, and offers that you’ve programmed to show up in eWebinar are the same in this embedded experience, and so is the chat. Which means that your students/clients can have a direct channel to send you chat messages as they’re watching the lesson. You have the option to hop in and respond in real-time, or respond later through email. The chat is all handled through the eWebinar platform, it’s super easy, and mobile friendly. This opens up a communication channel between you and your students so you can get direct feedback on how they’re doing, be able to build relationships with them, and increase course engagement and completion rates.
To embed one of your eWebinars as a multimedia lesson in your Thinkific course, take the following steps:
NOTE: You must first connect your eWebinar and Thinkific accounts before you begin this process. You may find those instructions here.
PART 1: Copy the Thinkific multimedia URL from eWebinar
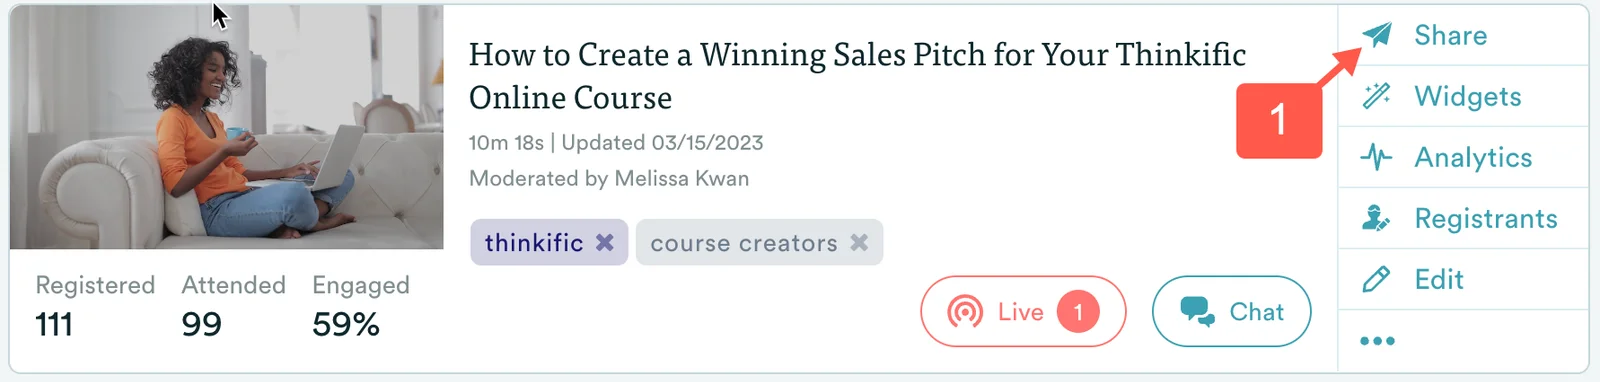
- Login to eWebinar and click the Share button next to the eWebinar you wish to embed in your course.
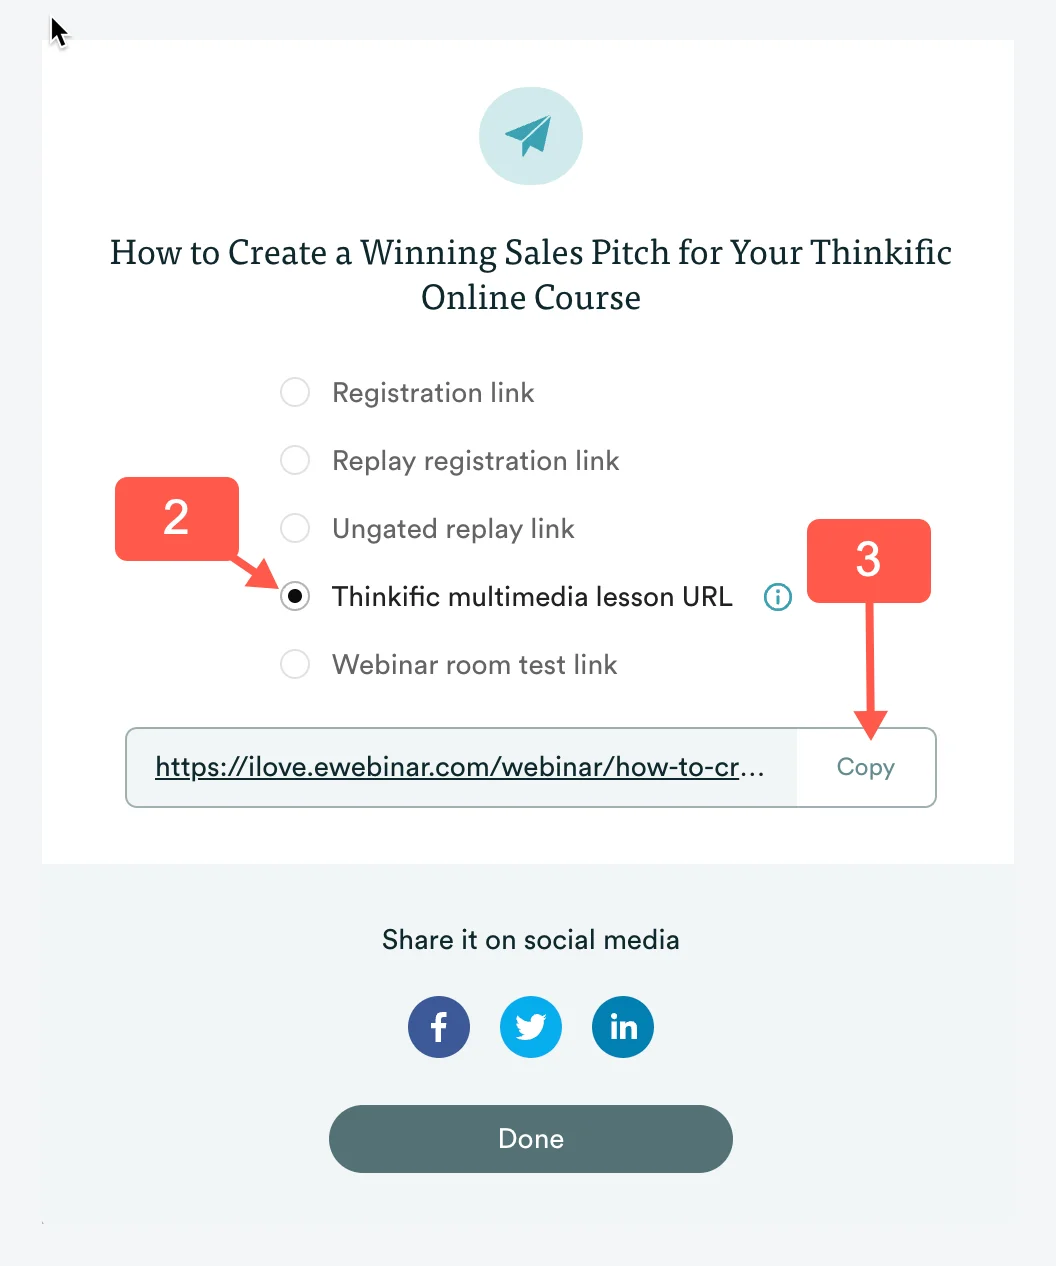
- In the Share modal that opens, select the Thinkific multimedia lesson URL. (You will not see this option until you connect your Thinkific and eWebinar accounts.)
- Copy the Thinkific multimedia lesson URL. (If prompted, you will need to enable the Ungated replay link first.)
PART 2: Paste the Thinkific multimedia lesson URL into your Thinkific lesson
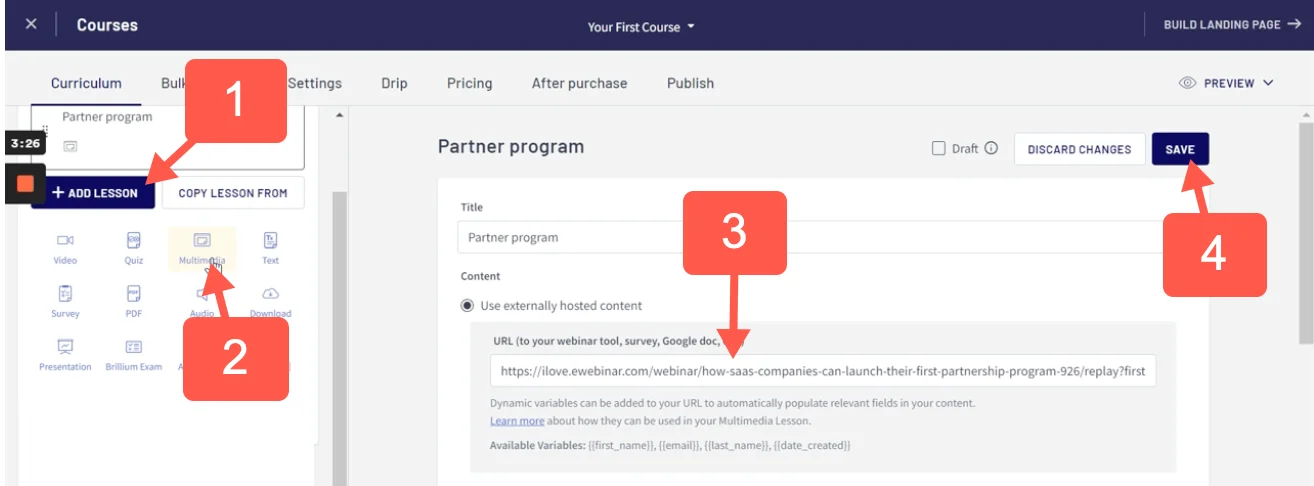
- Login to Thinkific, go to where you can add a new lesson to your course, and click ADD LESSON.
- Choose Multimedia as the lesson type.
- Once you've given your lesson a Title, paste the Thinkific multimedia lesson URL from eWebinar into the field provided under Use externally hosted content.
- Click Save. And that's it!
Setting up the integration
Before setting up the Thinkific integration, you must be subscribed to Thinkific Pro and Growth Package.
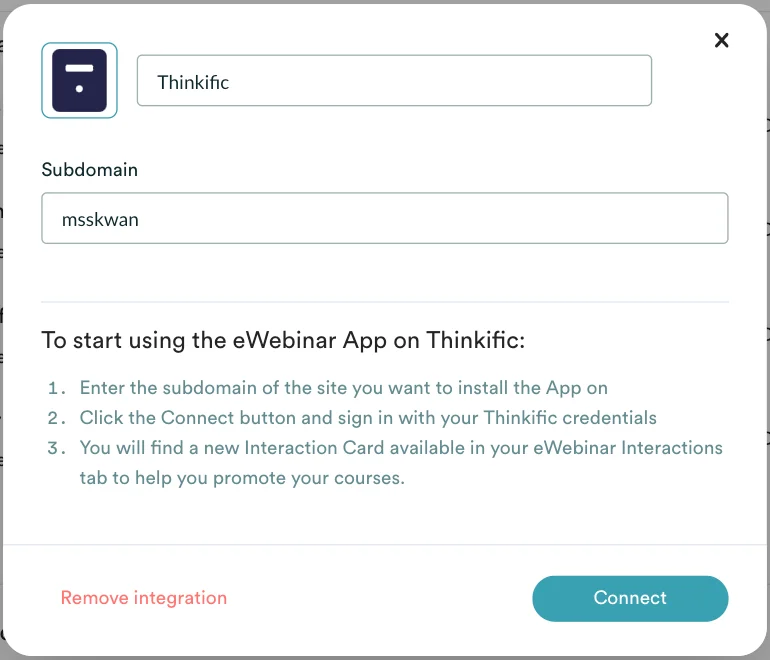
- When you are ready, go to the Integrations page in eWebinar, which can be found in the profile menu, and click the Thinkific integration.
- Enter the Subdomain you use on Thinkific, click Connect, sign in with your Thinkific credentials, and you're ready to go!
Adding the Thinkific interaction card
While you are in the process of creating the eWebinar you plan to use to sell your Thinkific course, if you go to the Interactions tab, you’ll see the Thinkific offer card in the list of interactions to choose from. Keep in mind you must have at least one published course before you can use it.
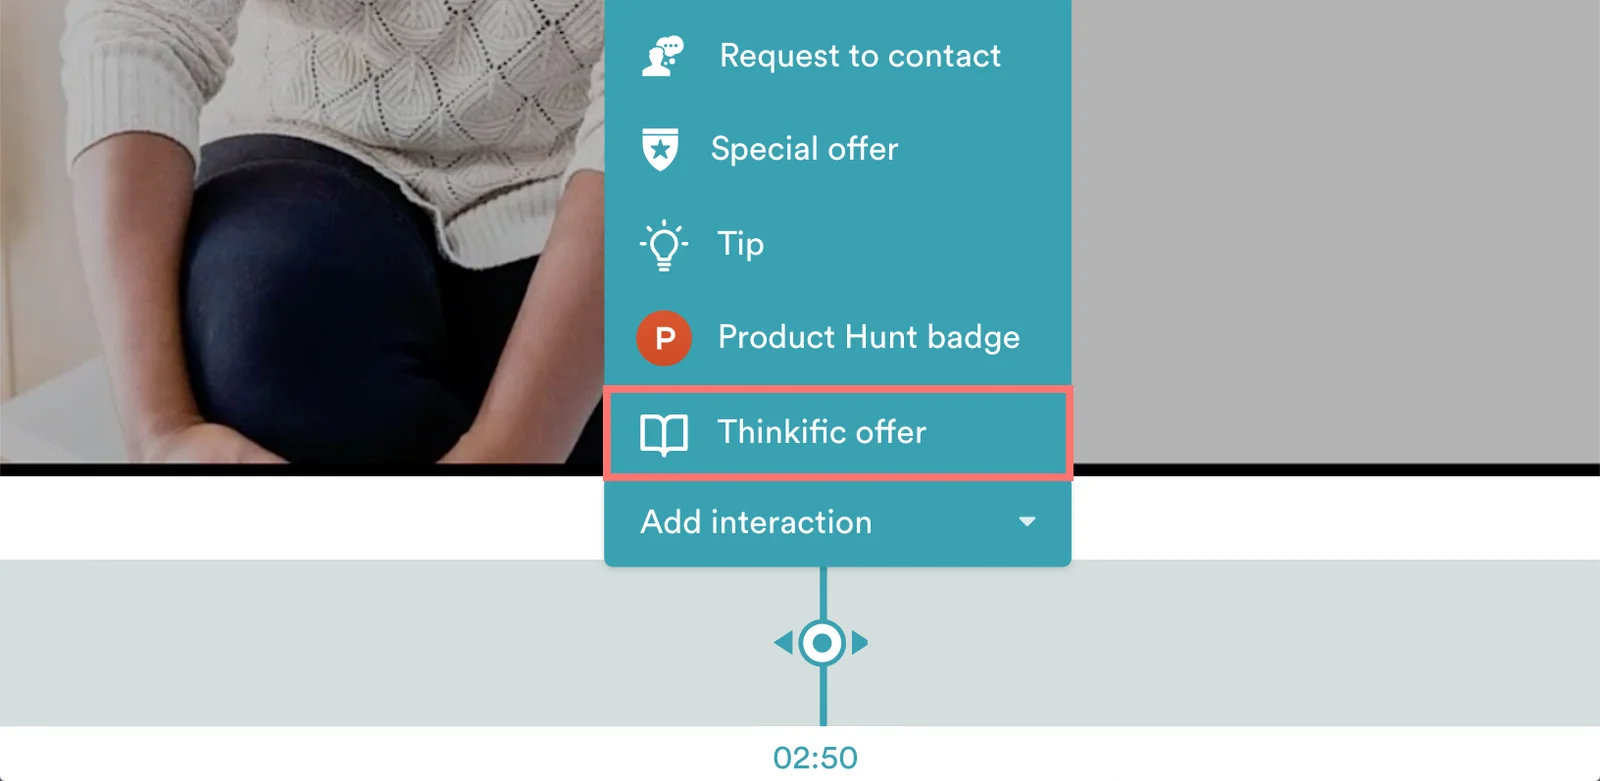
TIP: If you use the Thinkific template to create your eWebinar, the Thinkific interaction card will have been added for you already. All you have to do is link it to your course!
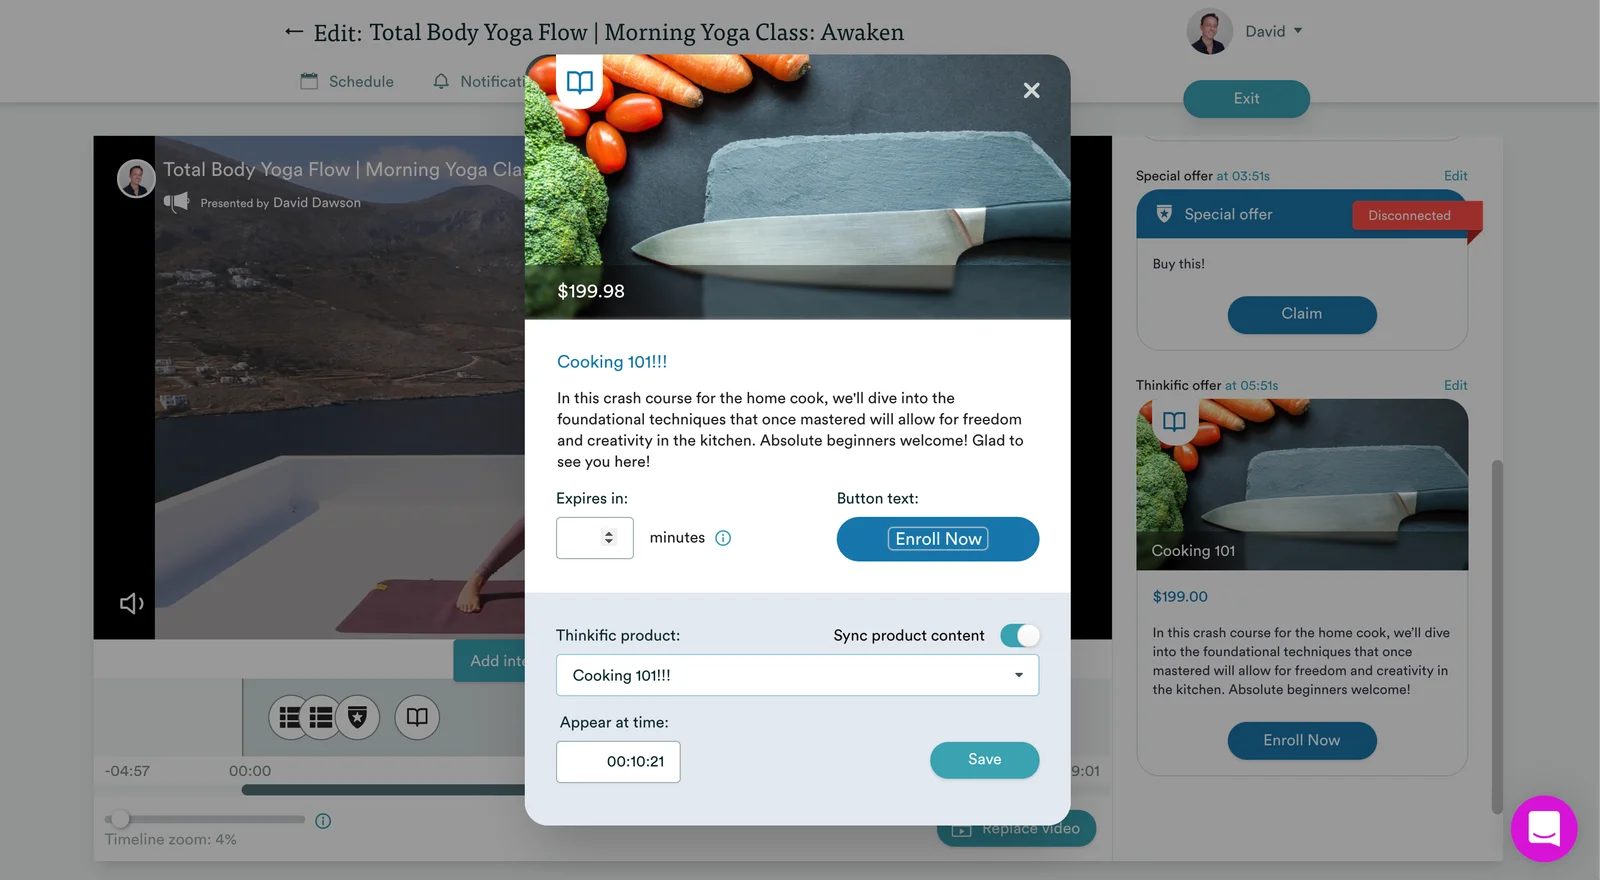
- Add the Thinkific interaction card at the moment during your eWebinar when you would like direct people to purchase your course.
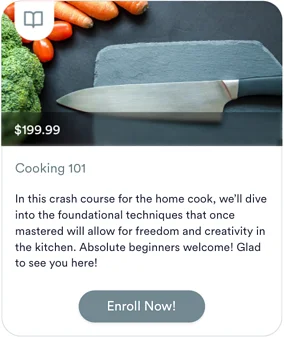
- Select your Thinkific course and watch the card automatically populate with the course name, price, description and image from Thinkific.
- At this point, you can either edit the content in the card or enable Sync product content. If you do the latter, you will not be able to directly edit the card itself. Instead, whatever changes you make to those fields in Thinkific will be synced with and appear on the card automatically.
- When you are done, click Save. The button in the interaction card will send attendees directly to the checkout page of your course on Thinkific!
Using the Thinkific template
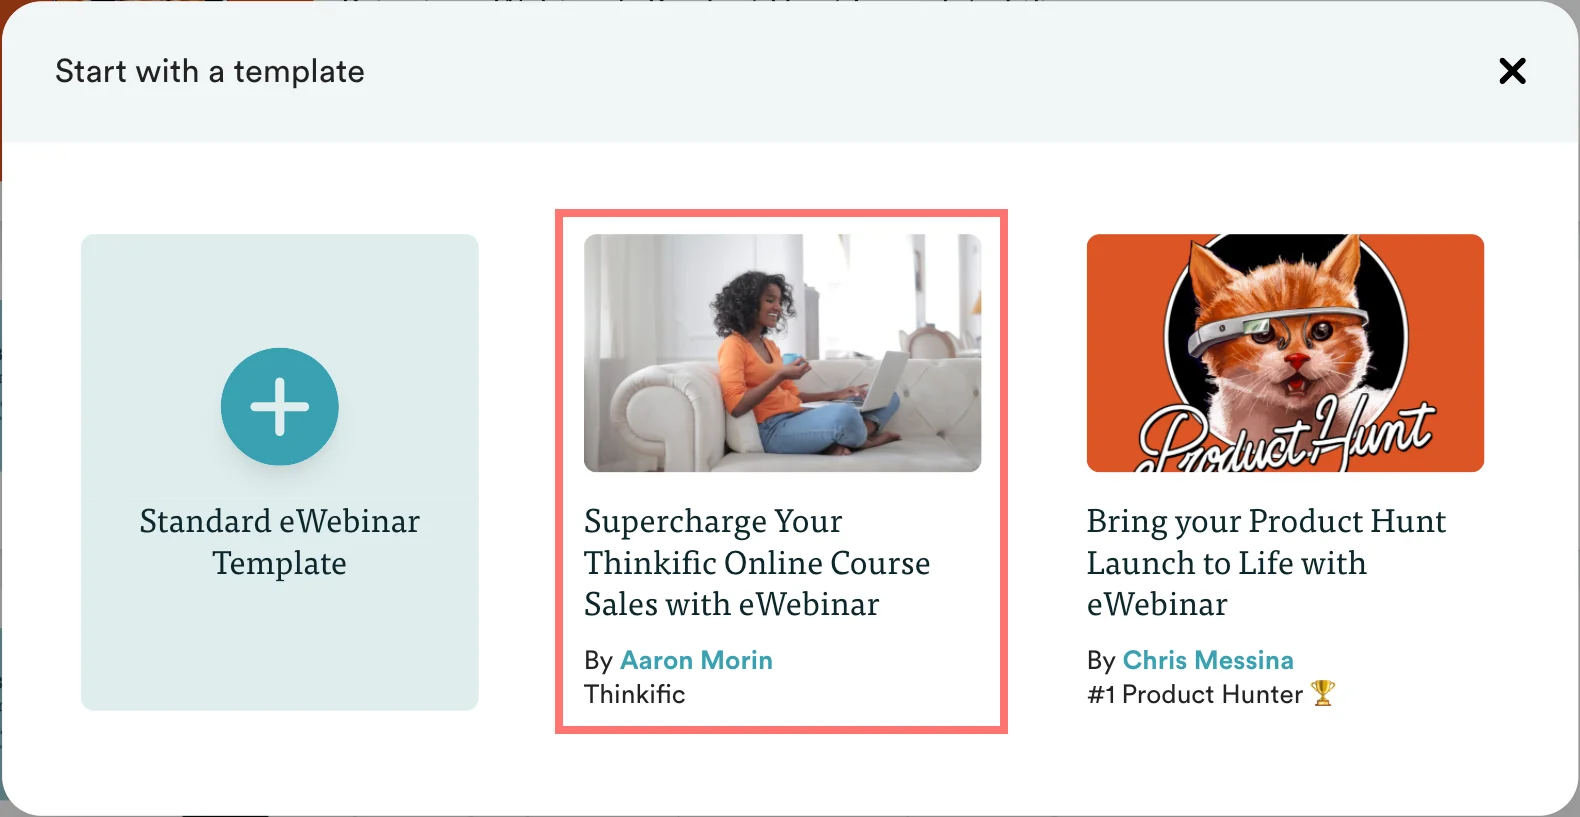
When you go to create your eWebinar, choose the Thinkific template.
From there, you can:
- Set a recurring Schedule that works for you
- Customize the content of your eWebinar as needed, including its Notifications, Interactions, and Registration pages
- Watch the short video on the Interactions tab to learn best practices to follow when creating a sales video for your own eWebinar
- Download a slide deck template you can customize and use when recording your presentation
Once your video is ready, upload it on the Interactions tab, Publish your eWebinar, and start selling!
Installing the eWebinar widget
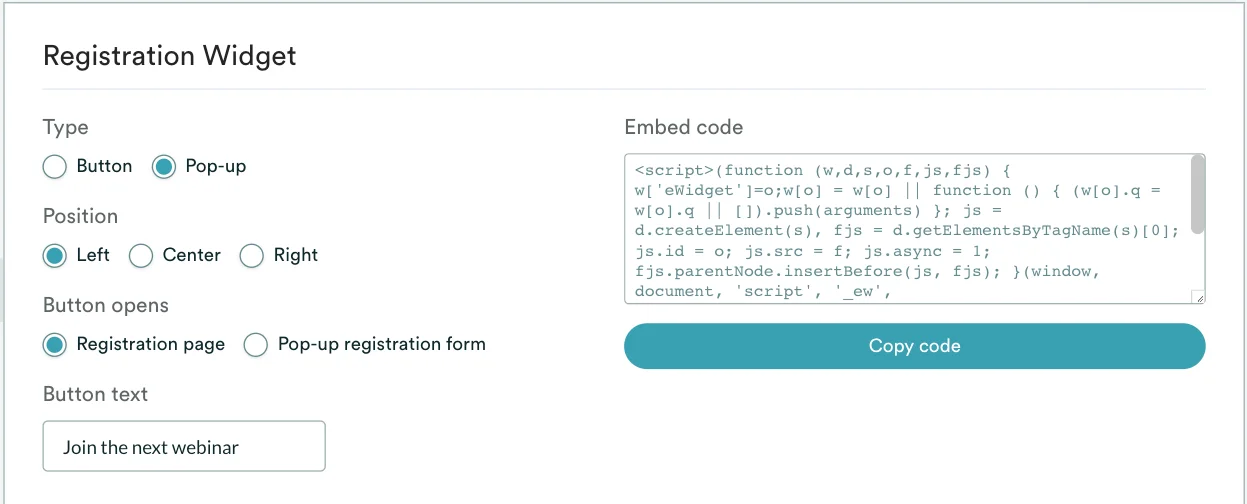
- From the homepage, click the Widgets button on the right side of the webinar you want to generate the widget for.
- Configure the widget, making sure to select Pop-up as its Type, and then copy the code.
Once you are logged in to your Thinkific account, you have a few options for installing the widget:
Installing the widget on every page
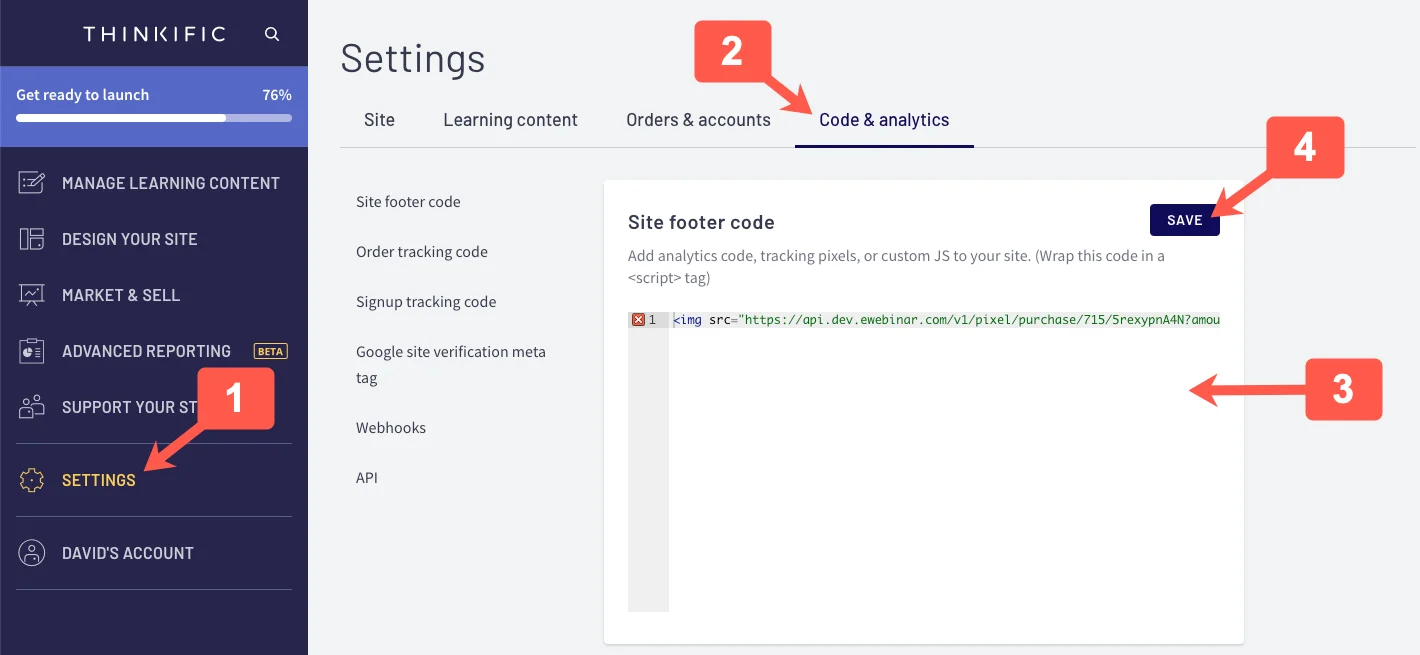
- Go to SETTINGS
- Then to the Code & analytics tab
- Paste the widget code into the Site footer code input box
- Click Save
Installing the widget on a specific course or bundle landing page
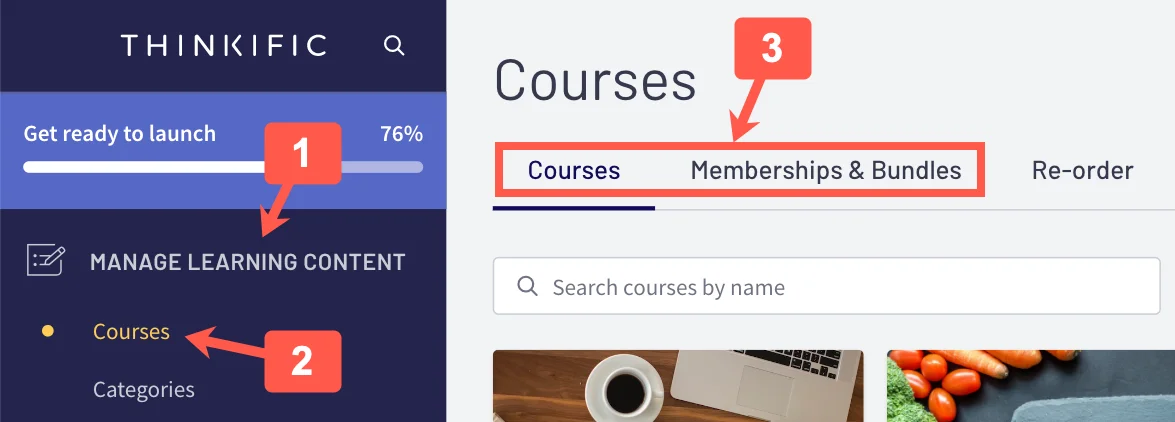
- Go to the MANAGE LEARNING CONTENT menu, and select Courses.
- Go to the Courses or Memberships & Bundles tab and select the course or bundle where you would like to install the eWebinar widget on its landing page.
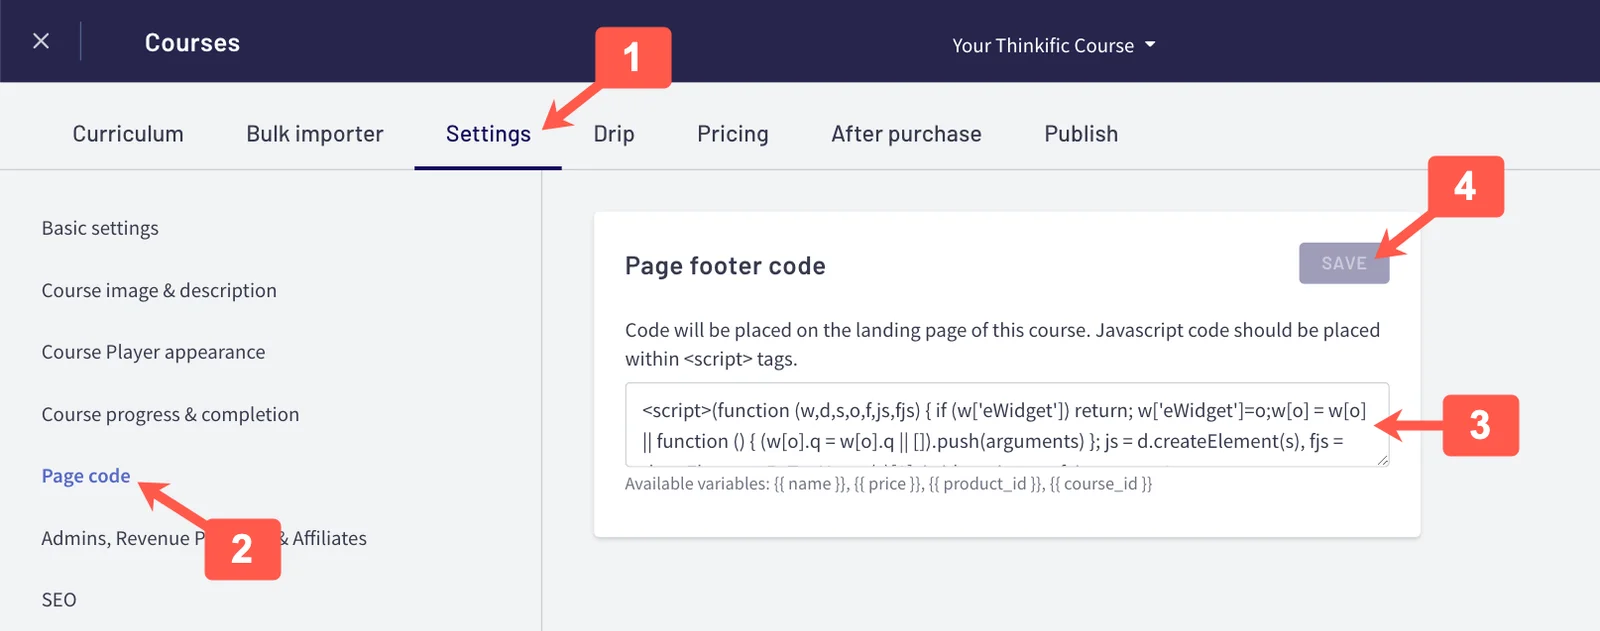
- If you selected a course, go to the Settings menu, select Page code on the left, paste the widget code in to the Page footer code input box, and click Save.
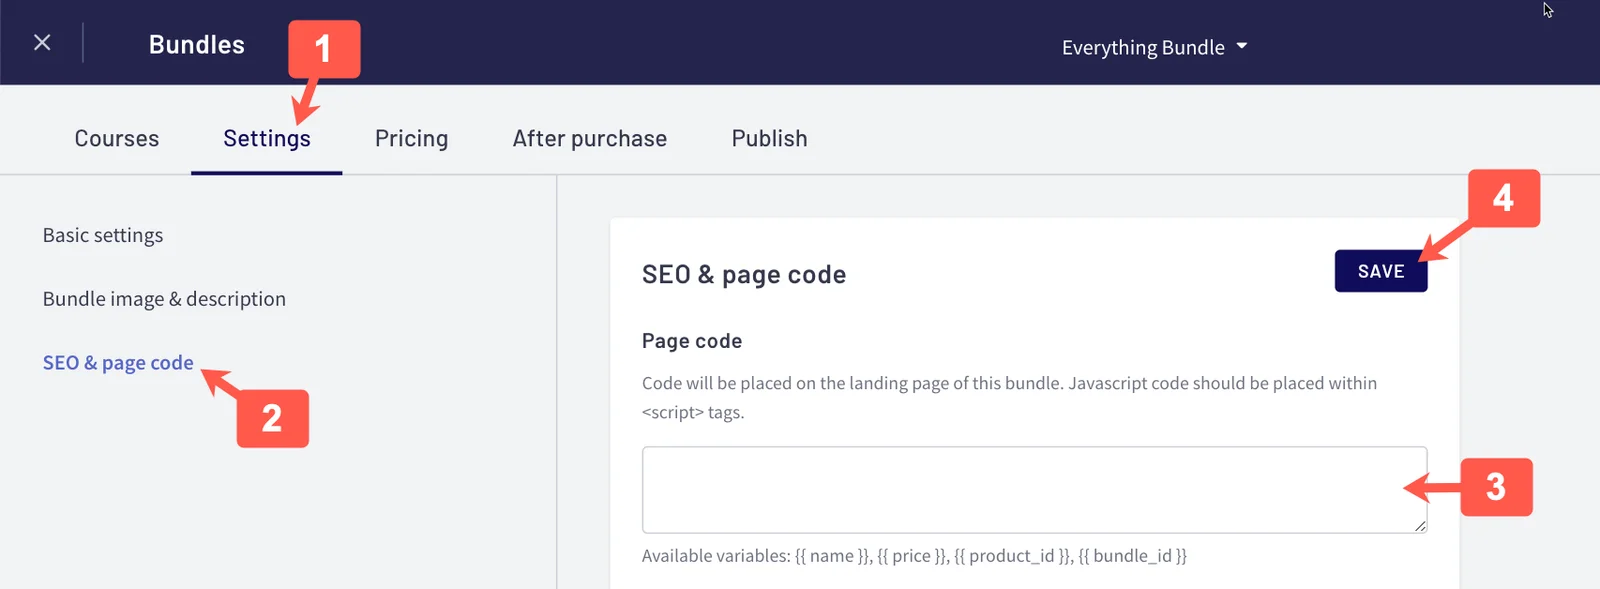
- If you selected a bundle, go to the Settings menu, select SEO & page code, paste the widget code in the Page code input box, and click Save.
When you are done, you should see the eWebinar widget has now appeared wherever you chose to install it!
Frequently asked questions about the eWebinar + Thinkific integration
What is Thinkific?
Thinkific is a software platform that enables entrepreneurs to create, market, sell, and deliver their own online courses. To learn more, visit thinkific.com.
Why should I use eWebinar to sell my Thinkific online courses?
Read this article to learn more.
What is the Thinkific interaction card?
The Thinkific interaction card was designed for Thinkific course creators to help them drive online course sales. The card can be programmed to appear at the moment during the sales pitch of your eWebinar when you want attendees to be able to get to your checkout page with one click. Once you link your Thinkific account to eWebinar, your course's name, price, description, and image will automatically populate in the Thinkific interaction card when you create it.
What is the Sync product content feature?
If you want the content in your Thinkific interaction card to stay in sync with your Thinkific account, enable Sync product content. While enabled, you will not be able to edit the product name, price, description, and image shown on the Thinkific interaction card directly. Instead, whatever changes you make to those fields in Thinkific will be synced with and appear on the card automatically.
What is the Thinkific eWebinar template?
The Thinkific eWebinar template was created by Aaron Morin, Customer Education Lead at Thinkific, to teach you, a course creator, how to put together a winning sales pitch for your online course. His simple, five-step presentation structure will help you showcase the value of your course so people go from just thinking about taking it to signing up. Simply upload your own sales video, personalize the content, and start selling right away!
Here are some of the things that have been built into the template:
- Best practices for selling your course (7-min video)
- Recurring schedule designed to maximize your reach
- Pre-set interactions that support Aaron’s 5-step approach
- Email notifications to reinforce your course’s value
- Suggested content for your registration pages
- Interaction card that puts your checkout page one click away
Use this template to supercharge the sales of your Thinkific courses today!
What do I need first in order to set up and use the integration?
In order to set up the Thinkific integration, you must be subscribed to Thinkific Pro and Growth Package. To use the Thinkific interaction card, you must have at least one published course.